Sunday, February 27, 2011

Inkscape More Tuts


I googled Inkscape Knots to see what others are doing with that feature and found this blogger/youtuber that uses Inkscape to make designs for die cutter machines. I don't know anything about die cutters, but must be used for crafts, scrapbooks, greeting cards, etc.

She has lots of interesting ideas using Inkscape's Interpolate, Tiled Clones, Live Path Effects, Outset, Inset/Outset Halo and more.
She uses Trace, Clip, Pattern to eliminate background on a bitmap image. (I probably would have used the Bezier Pen.)
She uses Interpolate Sub-paths to make Rhinestone designs. The circles don't get distorted as they move along the path.
But again, I noticed some odd behavior with the Path Effect Editor where it snaps things to the Top Left Page Border. So if things disappear off the screen, look there for your results.
She works on fonts and dingbats too. Shows how to edit and color them, make them thicker.

Carolyn from Brisbane, Australia:
Blogger
YouTube

Friday, February 25, 2011

Inkscape Tiled Clones Flower Petals


Found the idea at Deviantart.
Dated 2007, but still applicable in Inkscape 0.48.
Quick and easy. I like those kinds of tuts.
I like that the tut makes petals with two rounded corners rectangles and Path/Intersection.
The gradient is transparent on the white end. Get a different effect if it's opaque/solid.
Mine is on black background, so it looks different.
With the Tiled Clones, 1 Row, 6 Columns with a P6 60 degree rotation is sufficient.
No need to select the width/height or create more rows and columns than that.

Inkscape Interpolate Cage


I used rectangles and bezier pen. Miter the edges (Stroke area). Then Interpolate. I "cut" or deleted the nodes in front from the interpolates (Combined first, select node, break apart, delete). Then I interpolated just the front lines.

Interpolate Wireframe
Spanish, Uses 3D boxes.

Interpolate Circle
Dated 03 Feb 11.
The video is 14 minutes long and he doesn't get to the circle until about 11 minutes into the video.

Inkscape Ideas

Inkscape 0.48 Windows 7
Ideas dump


I got several tips from watching this guy work.
Searched YouTube for new Inkscape videos.
These are dated Feb 2011.

Space Bats 1
Inkscape Path Operations - Space Bats

Bezier Pen to make star, then Path/Union.
Two circles, Path/Difference to make the Moon.
Several circles, Path/Difference making the bat body and wings. (I think Union to circles first, then Difference.)
Clones the bats.
Division on rectangle and circle.
Spacebar to make copies.
Uses color and opacity as aid to drawing & editing, then adds final coloring later.

Space Bats 2
Inkscape Path Operations - Space Bats, Bonus

Makes a planet with a ring and uses a combo of Copy, Difference, Difference, Paste to get the back side of ring behind the circle.
(I think it's Paste In Place.)
Uses Shift/Circle Tool to draw around starting point. (Read Help text at bottom of screen in Inkscape.)
Makes initials by drawing the space instead of the letters with Bezier Pen.

Working in Inkscape takes a different way of thinking about shapes and forms.

Watch him work with nodes here.
Inkscape Bezier Pen Exercise - Desert

He also has monogram tut videos 1 and 2 but those were too long and fiddly for me to sit through.

MORE:

While I was editing nodes in Inkscape, I noticed the Stroke to Path icon on the Nodes Tool, Tool Controls Bar.


Crop Tut
Object, Clip


Background image is Microsoft Office Clipart, although I think it could be easily made in Inkscape and I want to try that eventually.
MC900441146.JPG

I found several interesting ideas within Inkscape under Help Menu, Tutorials, Advanced
Division vs Cut Path and Exclusion vs Combine.
Path/Combine will make holes where the objects overlap.


Outset/Inset
Inset could be useful for making letter stencils.

Outset:


NOTE: There's also Inset/Outset Halo under Extensions/Generate from Path. (Video)

Kerning of individual letters without Object to Path and Ungroup.


Sunday, February 20, 2011

Inkscape L-System Turtle

Inkscape 0.48 Windows 7
Extensions, Render, L-System

InkscapeForum
“It's more of a grammar than maths.
It resembles an old computer drawing game Turtles,
some kids still learn about it today.
You have a turtle that you can order where to move,
as she moves she leaves a trail,
if you are careful of the moves you can make a meaningful drawing.”

This is my lame attempt at tracking the "turtle."


Order 2, I'm already lost:


Several assumptions:
I assumed the same Turtle start position as Order 1.
I assumed Order 2 would draw Order 1 twice, nope.
I assumed the lines would not overlap, nope.
I assumed the "turtle pen" was one continuous line, no again. I think it skips or jumps. It goes around in a circle (not always continuous) and then starts to go around in another circle but stops before it finishes.


If the "turtle pen" was one continuous line, then color blue and color red would be together, because color blue is turtle position after color red which is the first path drawn in Order 1. Got all that? lol Oh, but we haven't even started with this yet. Anyway, I made 4 different colors of Order 1 because I think initially, Order 1 line goes around in a circle. Then I started trying to track the path. I have no idea if I'm correct, but it seemed to be consistent behavior thru Order 4 which by then was a totally HUGE 3421x1711 fractal drawing.

I didn't overlap my colors so they would be visible, but this shows that the fractal drawing does overlap the lines.

Order 3 looks like it takes Order 2 chunk and plops it around, somewhat circular.


I probably should have started with a simpler Order 1 formula to track. I thought if I could figure out what it did, I could create specific patterns, but I'm lost. This one is pretty, though. It has hearts and looks like a bear by Order 4. It reminds me more of ASCII art than fractal art.


Parameters:


Turtle
(Edited by me.)


Previous L-System blog posts:
Sierpinski
Parameters
Penrose
Fractal Cross

Inkscape Fractal Cross

Inkscape 0.48
Extension, Render, L-System


What would a person do with these, I'm not sure.
The image above is a Step Length 2, duplicated, Flip Horizontally, Group, Rotate, Export.
Export took forever.

This next one is a closeup of the cross part of the fractal. I guess you'd call these fractals.
Step Length is 5.


Export a section without separating it:
I created a rectangle on a layer below the part I wanted to export.
Hide the rectangle layer while keeping it selected and Export.


Cut out a section and then Export:
Create a rectangle on top of the piece you want to cut out.
Select both fractal and rectangle, Object/Clip, then Export
I suppose a person could try Tiled Clones on a Clip.

Parameters:


Help Tab:


What do the other Letters mean that I see used in L-System? I don't know.

OpenClipArt
Same Axiom and Rules, different Order, Length, and Angle.

Previous L-System blog posts:
Sierpinski
Parameters
Penrose

Saturday, February 19, 2011

Inkscape Penrose

Inkscape 0.48
L-System Extension


Coloring one of these is fascinating.
What do you see?
At first, I saw the creamy shapes, then the stars, and then started seeing polygon "balls."
The creamy shapes are stars too only rotated slightly, but I did not see them as stars. I saw them as boxy shapes.

Rendered in Inkscape, colored on layers in Paint Shop Pro.
Same color green, but different layer opacities to distinguish the different shapes.
Creamy background.

Parameters at
wiki
Mine is Order 5, Step 25
Be prepared for Inkscape to crash on an Order 5. It gets real sluggish.

Can select the entire thing and change Stroke Color in Inkscape.
If you want to color the sides in Inkscape, Path/Break Apart first, then Node Tool to select the sides and color them.
When I tried it, not all sides were properly broke apart however.
And some were transparent.
Can see that by the slight variations in the "creamy" colors on this one colored in Inkscape, Order 3.


Also
here.
Mentions:
Tessellation
Space-filling curve

More wiki:
L-system
Penrose Tiling
Shows a colored Penrose.
A pentagonal Penrose tiling (P1) on a rhombus tiling (P3).
A P1 tiling using Penrose's original set of six prototiles.
More

Previous L-System blog posts:
Sierpinski
Parameters

Manual

Wednesday, February 16, 2011

Inkscape Spiro Surprise


Another pretty spirograph pattern that I made just fiddling around with the parameters.
Exported and then layered in Paint Shop Pro so I could use Hard Light Layer Blend and pump up the color/contrast a bit.

Inkscape Tiled Clones Flower of Life Challenge

Flower of Life:


Made in Inkscape 0.48, but colored and layered in Paint Shop Pro.
I tried making this with Inkscape Tiled Clones and just could not figure out how to get the circles to line up correctly.
I can get close.
Anybody out there know if this is possible to do in Inkscape with Tiled Clones?
Or an extension maybe?
I did find this one Python extension that I think is supposed to do Flower of Life but I don't know how to use it in Inkscape.

I did use Tiled Clones to study how the Flower of Life is made. But in the end, I resorted to lining up the circles with grid, guides, grouping and regrouping the circles until I created the Flower of Life.

Zoomed in view of circles crossing:


As far as Tiled Clones:
P1 Symmetry
Uncheck: "Use saved size and position of the tile" I'm not sure what that is, but it was giving me some strange results.
I know the center rotation (crosshair) on the circle must be moved down to the bottom of the circle.
I know the column shift is -50% on X.
It's the row parameters I could not figure out.
I got close with a Shift and Rotation with Alternate.

I can do a mini flower of life:


Center rotation (crosshair) on the circle must be moved down to the bottom edge of the circle
P1, 1 row, 10 col (Looks like I only needed 6 instead of 10?)
Shift X -100 Col
Shift Y -100 Row
Rotation 60 col

I can sometimes get something similar with spirograph too, although the pattern is imperfect.

I first saw the Flower of Life at mathworld.

Then after I had already make mine, I found the ones at wiki:
My fav.
The one like mine.
And carpet is pretty too.

Monday, February 14, 2011

Inkscape Tiled Clones Spiral Challenge

Inkscape 0.48 Windows 7


So I've been working on this for about 4 years now. lol

4 years ago I made a tiled clones spiral by grouping a star with a spiral.
But that's not really what the Manual is doing.
The "logarithmic spiral" refers to the Base parameter in the Tiled Clones Menu.

Back in 2007 I moved the center rotation (crosshair) by grouping objects with a rectangle.

I think this may have changed over the years, but anyway, this time I just moved the crosshair on the object.
Select object with the Select/Transform Tool, click again and the arrows change and the crosshair appears. Drag the crosshair.

This is my star I used for the tiled clones spiral.


My spiral is not as perfect as the manual's spiral. But if I use the Base parameter of 2.7 my spiral gets so huge I can't display the entire thing on my screen even at 1% zoom. So, I used a Base of 2.0 and was content. :) From my understanding, the Base has to do with the stars not bumping into each other as they spiral around. Even at Base 2.7 my stars still bumped into each other in the center.

Other than the Base difference, I think my parameters are the same. My spiral looks different than the manual's spiral, but I'm happy with what I accomplished.


Zoom of center:


Wallpaper:
(Setup in Inkscape, edited in Paint Shop Pro.)


The other spiral challenges:


Inkscape Tiled Clones Wallpaper Flower

Inkscape 0.48 Windows 7

Here's the flower I created with Tiled Clones from that video, another zoomed in wallpaper.


Select Original (Shift/D) and pull out the original petal used for cloning, then fiddle with different colors. Radial gradient on petal, which doesn't look that great zoomed out, but I liked it when zoomed in. Those little dots in the center are fill pattern (Fill/Stroke Menu) on a circle object. Another gold circle behind it as the dots are transparent background. Exported and finished in Paint Shop Pro.

Sunday, February 13, 2011

Inkscape Clone Patterns

Inkscape 0.48 Windows 7

Some interesting Clone Patterns I made while playing with Tiled Clones.


A few Tiled Clones videos:

Clones and Spray Tool
Unset Paint.

Radial Tiled Clones
Flower petal, Ctrl/drag node straight up, Moves crosshair center of object.
I think his Shift Tab parameters are backwards. Dated June 2009. The crosshair thing is important to know.

About Inkscape's Tiled Clones 17 Symmetry patterns, Wiki might have some interesting links on the subject. I haven't checked them yet, but maybe some pattern ideas there.
See Wallpaper Group.

Inkscape Live Path Flower

Inkscape 0.48 Windows 7

Flower:


Good news: Happy accident
Bad news: I can't repeat it. I can get similar, but I like this one the best. Probably too many variables.

I was playing with a star copied onto a spiral within the Path Effect Editor under the Path Menu (Pattern Along Path) and comparing that to the Pattern Along Path under the Extensions Menu.

Friday, February 11, 2011

Google Fonts Won't Display in Firefox - Fixed

At Blogger Buzz it says there are additional fonts to use, but Firefox was not displaying them correctly at Google Fonts.

I fired up IE8 and, yes, the fonts display correctly.

I check NoScript and AdBlock and Firefox About:Config...
But wait...NoScript Icon has a little dot on it...
Blocked Object.


Aha! That's the problem.
However, I could not figure out what setting to change so it would be fixed permanently.

Via this site, Thank you.

Here's the setting to uncheck:


Now I can play a little with fonts.
I like:

I'll have to figure out how to use them inline in my blog posts, if that's possible.
Probably have to tweak my template, I suppose.

Inkscape Colorize Stroke Markers


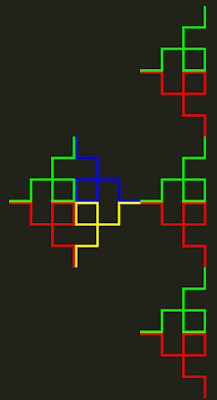
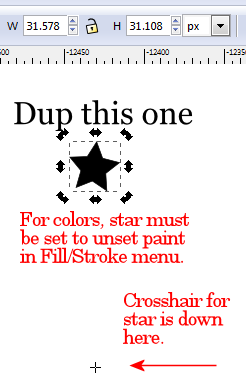
Yes, the Stroke Style Markers can be colored—with Filters.
Stroke color just changes the line color, the Markers stay black.

Pencil or Bezier Pen work to draw the line.
Then Objects, Fill and Stroke, Stroke Style Tab to style the line and add the Markers.
Use the Node Tool to adjust direction of Markers and line.
Then add the Colorize Filter.
Because the Marker is black, it doesn't change color until you go into the Filter Editor.
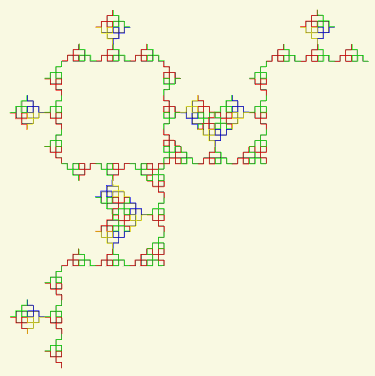
Default Colorize settings will not change black color. That is the case with Paint Shop Pro Colorize as well, so maybe that's normal. But at first, I just thought I could not change the Marker color at all.
Not so.
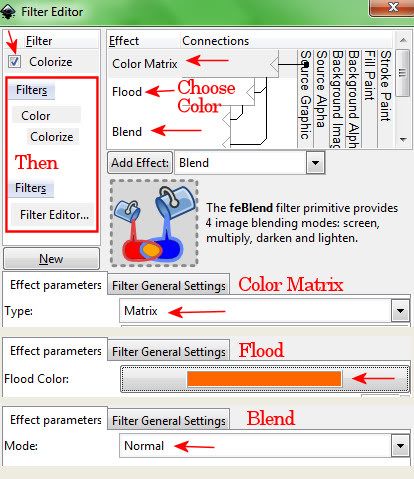
Filters, Filter Editor
For Colorize Filter,
Change the Color Matrix Component to Type: Matrix, instead of Saturation.
Or Blend can be changed from Multiply to Normal.
The Flood Component area is where you can choose the Color.
Tada! The Marker should now be the color you desire it to be. :)


UPDATE:
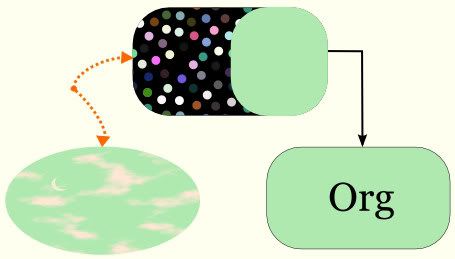
Can change the marker color under the Extensions Menu.
Extensions/Modify Path/Color Markers To Match Stroke.
I think that's eventually going to be fixed.
Ref1
Ref2
There's also additional info on creating your own custom markers.
END UPDATE

Something I hadn't realized is that in the Filter Editor, if the Filter has a Flood Effect component, that will change the color.
Like the Clouds Filter has a Flood in it, so that means you can change the cloud color from white to whatever you want.

There isn't much information out there on the Filter presets and how to tweak them. I'd like to see more details on the "Effect" part of the Filters Editor. What those Effect components do, what the connections do, as well as what the parameters at the bottom do. Not the minutiae technical math, but the general effect each has on the overall result of the filter.
Like, say you want to create a Filter. How do you decide what Effect to use, what connections to make, and what parameters to fiddle with? Who's the Inkscape Filter guru to go to for this kind of thing? :)

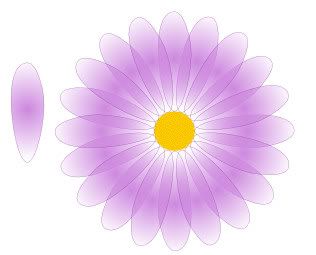
Something else under the Fill and Stroke area to play with are the Patterns.


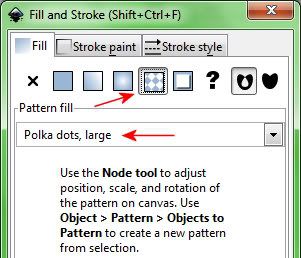
I liked Polka dots, large.
Change the color of those.
Extensions, Color, Randomize
And/or Extensions, Color, Custom
Then add Filters, Shadows and Glows, Glow.
Add a black rectangle behind the dots.
Try Filters, Shadows and Glows, In and Out
With a Black background they looks like balls, with a white background they look like suction cups.
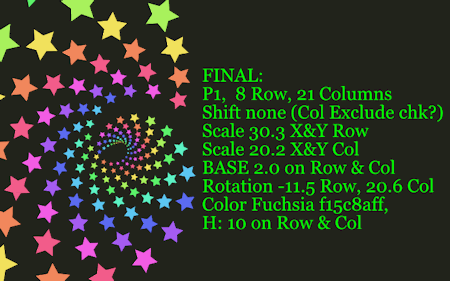
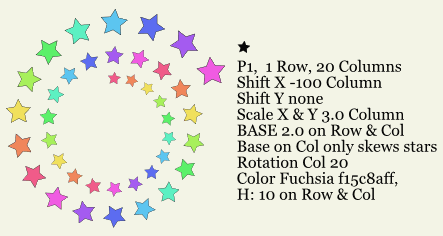
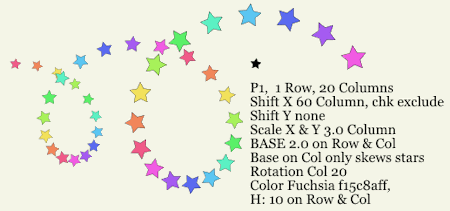
Manual Fill-Stroke
All those stripe patterns are used for hatchings. Oh.
New in v0.48, Swatches, Auto Palette.
There's a lot in this section to study.

UPDATE 30Dec11 (See Comments)

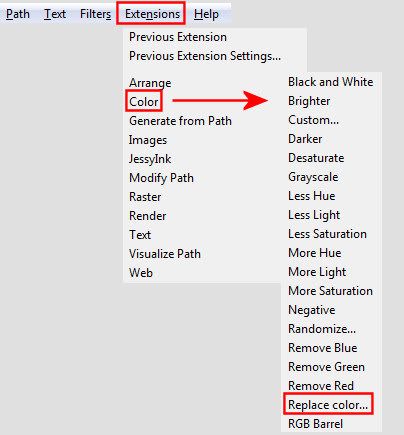
So after I applied a Pattern from the Fill and Stroke area,
then I went into the Extensions Menu at the top of the screen to Color the pattern.


Online Manual References (v. 0.47/0.48)
Start Page
Anatomy of Inkscape (Shows Extensions on the Menu Bar)
Fill/Stroke Menu
Extensions Color
To me, Custom is a little strange or hard to understand. :)
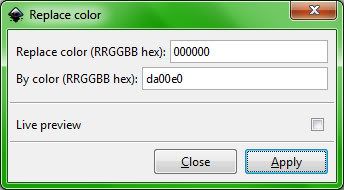
Try Replace color.
The dot pattern is black (RRGGBB = 000000) so
Replace color: 000000
By color: da00e0
And the black dots become pretty purple dots.


You can get the RRGGBB from within the Fill/Stroke area:


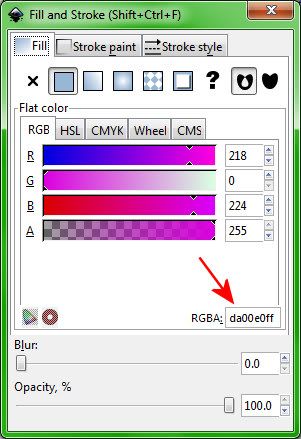
That might not be a completely accurate explanation of the hexadecimal colors as used here, but close enough to get the job done.

If you have further questions, you might find more timely help on the Inkscape Forums.