Thursday, September 09, 2010

OneNote 2010 vs Word 2010

I was trying to find a good online article on OneNote 2010 vs Word 2010.
Did not find it.
I've been working in both and trying to figure out which one I'd prefer using for research.

Here are my notes on the topic. Not exhaustive, just some of the things I found.
Look for the OneNote only features highlighted in yellow.

Basically, I'd say Word has far more features than OneNote.

OneNote has the Notebook like organization.
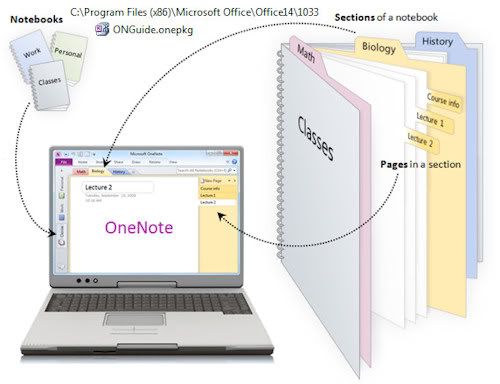

Notebooks are along the left side. Sections are Tabs at the top. Pages and subpages are along the right side. Everything together and linked, tagged, searchable, as desired.
Has a nice ruled lines notebook look if desired.

Word could have ruled lines with a ruled lined background image, but the lines won't line up with the text line spacing. (Page Layout Tab Menu, Page Color, Fill Effects, Picture Tab) I think some templates use Tables as a work around, but navigation is then different.

OneNote has very basic Tables, Shapes only. (Create tables by typing text and pressing Tab.)
Word has full featured Tables, Shapes.

Word has Columns, Find and Replace, Text boxes (nice preformatted ones too), WordArt, Drop Cap, SmartArt, Charts, ClipArt, more control over fonts (kerning) and line spacing.
Can Format/Edit Images and Clip Art in Word, can't do that in OneNote.

Draw features in OneNote are not much fun with a mouse.

(Check out Page Layout, Themes vs Home, Styles in Word?)

Word has ways to link stuff too, i.e. Hyperlink, Bookmark, Cross-reference (Insert Menu). I haven't worked with those enough to compare with OneNote linking abilities.

Word has a Navigation Pane (View Menu), but I haven't worked with that either, so I don't know how it compares to OneNote navigation.
Word has a Linked Notes feature (Review Menu), which works with OneNote.

Both have a screenshot feature.
OneNote has OCR on Images, so text on images is searchable.
Right Click on the image to get options:
Copy Text from Picture, Make Text In Image Searchable.
I don't think Word can do that.

If you copy and paste something from the Net, OneNote automatically includes the url link, which is handy, but not a deal breaker, just copy and paste the url too if you are using Word.

OneNote:
Calculator: type Space after = in expressions.
Word can't do that.

In OneNote you can type anywhere on the page with a click of the mouse. And everything goes in invisible boxes that can be moved around. I think this would be easy enough to do in Word with Text Boxes and you'd get formatting features for those boxes.

OneNote likes to do things for you. There is no Save. OneNote does that for you. You can't password protect an entire Notebook, only a Section of it (Right Click Section or Tab at top). When you open OneNote, it takes you where you were the last time you exited and ALL your Notebooks are listed at the left side column. (Right click on a Notebook and Close it.) You can't delete a Notebook from within OneNote. You have to delete Notebooks from within Windows Explorer (Look in MyDocuments).

I looked for options to restrict/stop some of OneNotes automatic features.
Under the Share Menu, Page Versions, Disable History and Delete all Versions, then empty Recycle Bin too. Then look at File, Options, Save & Backup settings, maybe Optimize Now.
File, Options, Display, uncheck Place OneNote in Taskbar.

Music/Audio/Video:
Word -
Insert, Object, Create From File Tab, check Link or Icon
Also wav files under Insert, ClipArt
(Get ugly diagonal lines across icon once it has been played? Close and reopen eliminates the diagonal lines.)
Right Click, Format Object, Layout Tab, Wrap and then icon movable, similar to Text Boxes.

OneNote -
Can Record Audio/Video.
Also Insert music file as Attachment or Link.
See File, Options, Audio & Video Settings - Audio Device set to Stereo Mix will record what is playing on Laptop (AudacityBeta is similar).
Can drag in audios or videos onto your pages? Didn't try that.

OneNote Page Templates are on the right column New Page area. There are no Notebook Templates, as far as I know (Like a yearly diary, for example, easy enough to create, though).
UPDATE: Online Notebook Templates here.

OneNote can be kinda quirky and unpredictable about adding extra lines/space.
Insert, Insert Space and mouse drag up to remove, mouse drag down to add.

In both Word and OneNote, you can Insert, Image and paste a url instead of a filename.

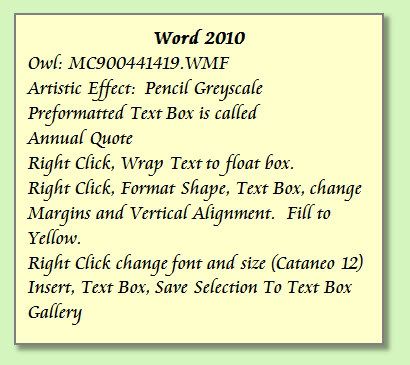
Word Screenshots showing Artistic Effect and Text Box:
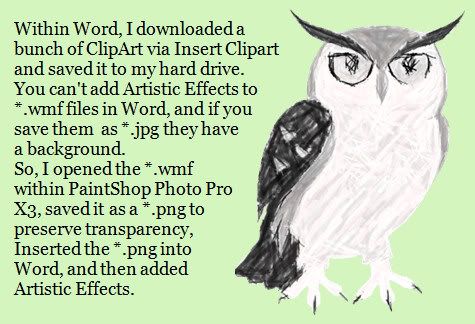

(MC900441419.WMF, Tag: Owl)

And just because I like it and it makes me laugh, here is another Clipart I downloaded:

(MC900134551.WMF, Tag: Books)
It makes me laugh because, 1) the book is so BIG, 2) toes are pointed toward each other, 3) the reader looks so intense.

LINKS:
Microsoft Images Online
MS Office 2010 What's New

Sunday, September 05, 2010

Laptop to TV, MP3 to Stereo

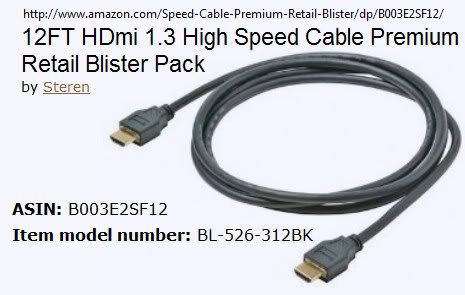
I bought a Steren HDMI Cable.
(Supports up to 1080p)
And hooked up my new laptop to the Samsung TV without a hitch.
Yay!


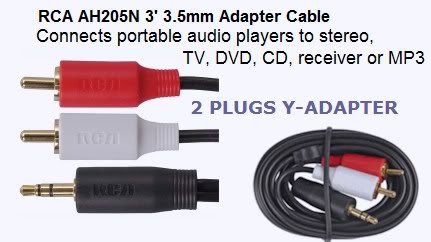
I also bought an Audio Cable Adapter.
(3.5MM to 2 Plugs Y-Adapter)
To hook up my MP3 player to my stereo.
And that worked too.
Yay!


I'd like to buy a Digital Media Player eventually too.

Windows 7 Notes

Keyboard Shortcuts

Windows 7 Keyboard Shortcuts

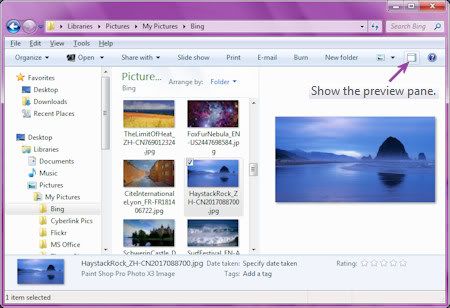
Alt/P for Preview Pane in Windows Explorer (Libraries)
There's also an icon at top right for Preview Pane.
Nice!
Works for images AND documents.


Tag Editing

Even though the tag editing in Windows Media Player 12 is more restrictive than it used to be and you can't add lyrics without a plugin, I did discover I can edit the Columns info in Windows Explorer (Libraries).
Yay.
Is that why there are now like a million different column headings/titles to choose from the drop down or what? ;)
Anyway, you can view, edit, copy, paste, etc. the info in these columns.
And you can edit a bunch at the same time, do batch labeling. I selected a bunch, then Right Click, Properties, Details Tab, edited a column, and that info was added to all the files I had selected.

I noticed Duration column is usually blank, but now Length column is used for that info instead.

NOTE: See my blog post on adding lyrics with mp3tag here.

Sticky Notes

Sticky Notes default font is
Segoe Print
then
MS Sans Serif

Paste preformatted text and it will retain that formatting.

Found here.

Also:
Keyboard Shortcuts for Sticky Notes.

Themes

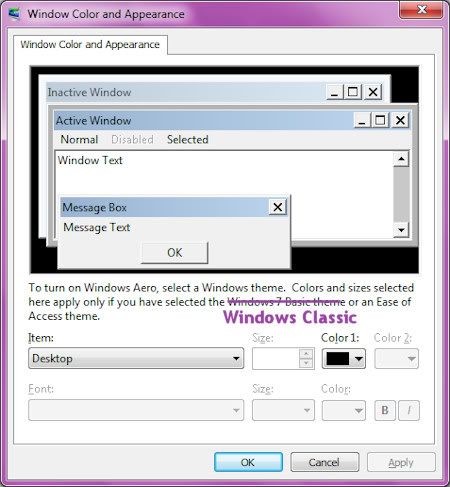
So why is it that when I change Aero Theme colors to a pretty purple or pretty green all it changes are the main windows? I'm still mostly stuck with that default blue scheme. In order to change all the windows, I have to use the ugly Classic Themes. I searched the Net for a work around but didn't find anything. I dislike all those Theme sound dings for this or that. Have to turn them all off.

Right Click Desktop, Personalize, Window Color

Cyberlink PowerDirector8 - Adding Images

Here's a short video clip I made in PowerDirector8:

480x270


Details below:

I was reading the PowerDirector Forum and found out you can add an image to the PIP Track on the Timeline.
I hadn't thought of that.

So far, I've learned three areas to add images on the Timeline at bottom left:
1. The Master Track (Storyboard)
2. The PIP Track
3. The Text Track (Editing mode)

So here's an interesting combo I came up with.
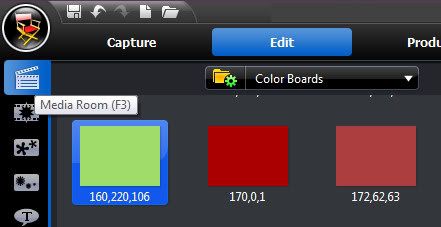
In the Media Room
Instead of "All Content" choose "Color Boards"


I chose three different Color Boards:
Green, Rust, Blue
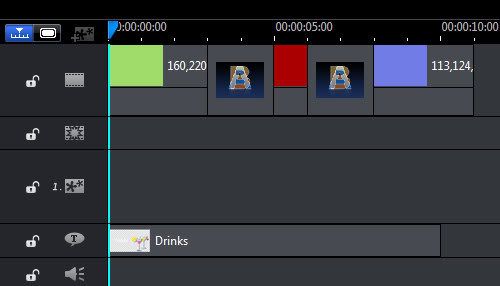
Add by dragging them down to Timeline Master Track area.

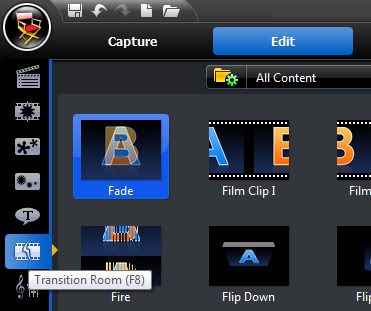
From the Transition Room, add Fade Transition in-between Color Boards.


All default values.

Then add a Text Track,


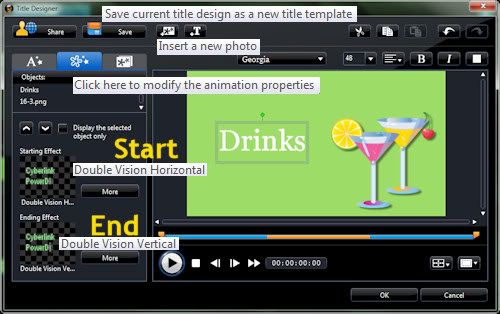
double click to edit, add image, add text, click on the text and animate it with starting and ending animation effects.
I used
Start: Double Vision Horizontal
End: Double Vision Vertical
You can't add animation to the image in the Text Track editing area, evidently.
But this combination of effects does fade that image because the Color Boards have the Fade Transition.


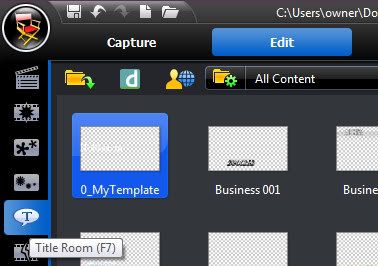
Note: I didn't like the ready-made text tracks, so I used Default and edited it and then saved it as a Template. (Name it something that will send it to the beginning of the template list to make it easier to find, i.e. 0_MyTemplate.) The ready-made ones did demonstrate some of the things that can be done in that area.

Here's what the Timeline area looks like:


I found the drinks image here:
GoTo:
C:\Program Files (x86)\CyberLink\PowerDirector
Search for
*.png (these have transparent background)
also try:
*.jpg

Tuesday, August 31, 2010

Hold On To Hope - Music Video

Testing videos.

480x270


Amy Stroup
Bing Wallpapers
Windows 7 Wallpapers
Cyberlink PowerDirector8
PaintShop Photo Pro X3 (PSPPX3)

UPDATE:

Okay, so I was thinking that video was kinda boring, not much going on, right.
Here's a *clip* of what that "Hold On To Hope" song would look like if it had animated text.

480x270


Only a clip, because animating all the text in a song would take FOREVER and many more slides.
The one background image seemed locked to text after I was finished, so I didn't edit that part. But could add different background slides too for variety.

I didn't work much with the Text area of PowerDirector8 at first, because it was too cumbersome to work with. But I returned to that because I wanted see what it could do with text animation.

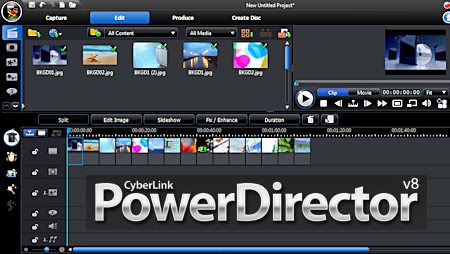
Cyberlink PowerDirector 8


Some Cyberlink software came with my new laptop.
I tried out the PowerDirector8 part of it which is for creating videos and photo slideshows.
I found it a bit cumbersome and difficult to learn.

Here are my notes on PowerDirector8.
First, turn up screen brightness (f3 key on my laptop) because the environment is very dark black background.

TOP LEFT SCREEN


At the top left screen there is Capture to add webcam, camcorder, microphone stuff - didn't try that.
Produce is where you save in a video format (I thought that section was fairly easy to figure out.)
Create Disc - didn't try that.
Edit is where you add your stuff.

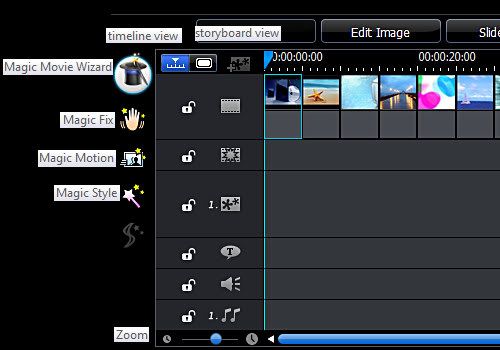
The room icons going down the top far left column are where you choose the stuff you want in your presentation. Drag what you want down to the Timeline View (click icon) area at bottom. If matching icons there, that's where you drag them. (The transitions get dragged to the images.)

Each room has menus that display across the top. Take a look at those.
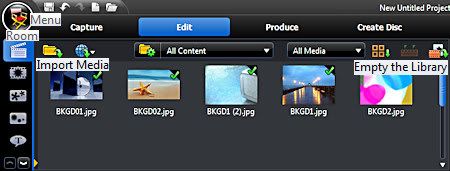
Also the Director's Chair at very top left has menus to look thru. There you can set the aspect ratio.

The first room is where you choose the images.
On the menus across the top left screen you can empty the library, import the media you want to use, choose Color Boards (blank colored background slides.)
Ctrl/A works to select all and then drag them down to the Timeline/Storyboard area at bottom and drag the images to arrange them in the order you want.

BOTTOM LEFT SCREEN


Some of the bottom section does not display on my screen. No scroll, so I did not know I wasn't seeing everything at first, but can mouse drag it up.

Storyboard view (click icon) you see image slides only.
Everything else in on the Timeline view (click icon).
The Timeline view compresses the timeline too much so I couldn't see the images. Click on the time tick marks above images/slides and drag out. Alternatively, there are zoom icons and a slider at bottom left of Timeline.

When I started adding stuff to the image slides, that's when it got real cumbersome and tedious to use.
In the Transitions Room I clicked on Fade and dragged it down to Timeline in between each image slide.
Then in the Effects Room, I chose Bloom and dragged that down to Timeline on the Effects Track area (matching icon) in between each image slide.
I wanted Bloom to come in at halfway mark of image display and last thru Fade and halfway into next image slide.
Whew! Next to impossible to do. (Note Duration option at the top of Timeline/Storyboard area.)
It wore me out trying to get everything lined up the way I wanted and timed correctly. It was difficult to see the finer timing details of the presentation and the settings seemed to change and shift unexpectedly and I'd have to reset them.
Maybe it would be better to add Bloom before Fade, but I doubt it.
Anyway, I really liked the effect of Fade and Bloom together IF I could get it the way I wanted it.

Add text in the Title Room - too clunky and time consuming to work with. I ended making my text slide images in PaintShop Photo Pro X3 and then Importing them into PowerDirector8.

Don't add any music until the very last (or mute it), because otherwise, you'll be very sick of hearing it every time you preview. (Preview is top right side of screen. Easy to figure out. Note view Clip vs entire Movie.)

SLIDESHOW
Okay scratch that. Try a simple photo slideshow.
New Project Folder icon at top left.
Media Room, Empty Library, Import Media, Ctrl/A (Select All images) (needlessly repetitive)
Ctrl/A (Select All) again, drag images down to Timeline/Storyboard.
Click the Slideshow option at the top of the Timeline/Storyboard area.
Choose Normal, pick out some music, done.
Now that's more like it! lol.

MOVIE WIZARD
There's a Magic Movie Wizard on the Left side of Timeline/Storyboard area to try also.
Pick images/slides, music, timing, done.

There's also Magic Style (didn't seem to work?), Magic Fix (photo adjustments), Magic Motion (add zoom/pan).
Not all features worked on my version and I kept getting upgrade nags which was irritating.

By the time I was done with a project I was sick of looking at it.
I don't know if I'll be making very many videos. They are a lot of work to make. PowerDirector8 does get a bit easier the more I work with it, but still very time-consuming.

I did make a HD wmv video 1280x720 just to see what it would be like.
Only a 4minute photo slideshow,
but
78,734 KB size!
Now that took a while to "cook" and lots of heat blowing out my laptop before that was done.

PaintShop Photo Pro X3 came with a separate video creation software called PaintShop Photo Pro Project Creator. I tried it, but ended up working mostly in Cyberlink PowerDirector8 because it had more features and effects. I might try to work with that more later.

Eventually, I want to see what I can do in Microsoft Office PowerPoint 2010 too.

Butterflies Video

Testing:

450x338


320x240


This is one of my first attempts to create a video with Cyberlink PowerDirector8.

I used my butterfly photos I've posted on my blog (See label below).
Most were 4:3 ratio (420x315 or 450x338) so tried to find a video format with the same aspect ratio.
For choices, it seemed like I had either
320x240 (too small)
or
640x480 (too big).

I like the 16:9 ratio (480x270) mp4 size best for online posting. Seems about right without getting too large in size.

I couldn't figure out what the deal is on uploading videos within Blogger.
If I upload within Blogger, where are my videos stored and can I access my video files and delete them?
Picasa is a mystery too. To upload you need special software. BUT downloading is not available. Huh? What does that mean? Can I embed it in my blog or not?

Photobucket seemed straight forward about it. Upload images and videos here. Process. And now here's the embed code. Simple. Thank you.

Blogger complained about the code. I just had to add the closing tag for embed (</embed>).

About the music:
Maid with the Flaxen Hair, by Richard Stoltzman was a free sample song on my Laptop.
Google It

YouTube:
Richard Stoltzman on Maid With the Flaxen Hair
Part One of Two
Grammy award winning clarinetist Richard Stoltzman discusses his recording of Debussy's Maid With the Flaxen Hair on Navona Records.
Part Two

Sunday, August 29, 2010

Hard Reset Laptop

HP Pavilion dm4-1065dx

My laptop wouldn't come out of sleep mode.
I might have plugged in a USB hard drive when it was in sleep mode and that may have caused the problem, I'm not sure.

HP site
"Some devices such as SD cards, USB devices, or other peripherals can prevent the PC from going in and out of Sleep and Hibernate."

Hard Reset
fixed the problem.

1. Disconnect all peripheral devices and remove all USB devices and SD media cards.
2. Disconnect the AC power adapter, remove the battery, and then press and hold the power button for at least 15 seconds to drain all residual power and restore default startup settings.
3. Reconnect the AC power adapter (but do not insert the battery), press the Power button.

UPDATE: Same problem again. Trying to figure out the cause. I moved the laptop while it was in sleep mode and that may have caused it? I have a USB wireless mouse. Don't know if that has anything to do with it.

Saturday, August 21, 2010

Paint Shop Pro Version Comparison and X3 Notes

PSP9 = Paint Shop Pro 9

PSPPX3 = PaintShop Photo Pro X3 (version 13)
I recently moved from PSP9 to PSPPX3, so these are my notes on that transition.

New Features since PSP9:

X3 - Organizer reworked, Multi-photo editing, Enhanced Express Lab, Smart Carver, Additional RAW support, Vibrancy, Object Extractor, On-image text editing, Photo Project Creator (photo books, collages, cards, slideshows, videos), Windows 7 compatibility

Note: Project Creator is a separate program. I also got Painter Photo Essentials 4 for free on the X3 DVD I bought locally. So there were three separate installations. At Corel website it says free KPT plugins with purchase, but as far as I know that is inaccurate information.


X2 - Express Lab, Graphite Workspace, HDR Photo Merge, Makeover Tools (Thinner, bright eyes), Visible Watermark, 30 new tubes and 30 new frames, Layer Styles

XI - Color Changer Tool, Depth of Field, Time Machine & Photo Looks, Skin Smoother

X - One click Red-Eye Removal, Makeover Tools (blemishes, whiten teeth, paint on tan), Object Removal Tool, Infrared Film Photo Effect, Organizer instead of Browser, Color Management changes?

New features links:
Corel PSPPX3
Google pdf comparison

High Pass Sharpen is a new feature since PSP9, but I don't know what version that was added.

Customize Menus and Toolbars in X3:
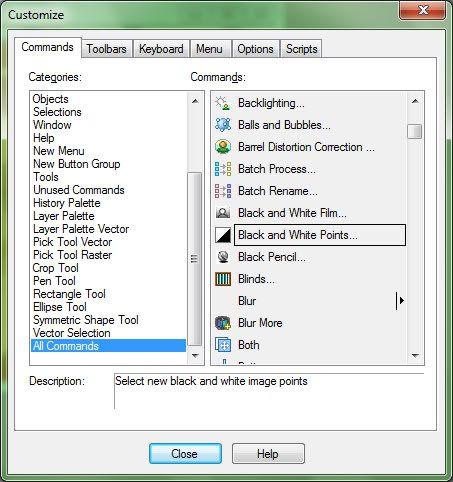
Right click on any Toolbar, Customize, Commands Tab, All Commands.
Will find previous versions items that were removed from X3 Menus and Toolbars.
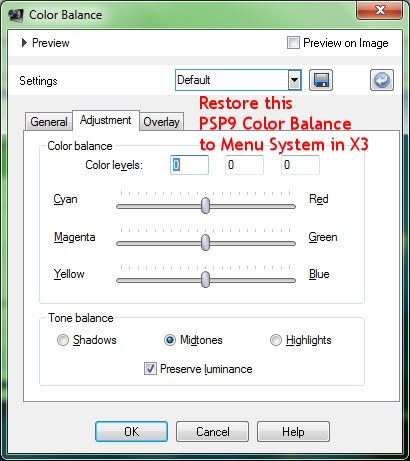
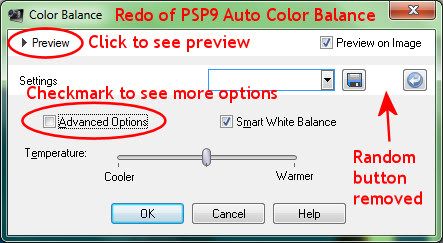
Some I've restored are Black and White Points, Grey World, Manual Color Correction, The old Color Balance under Adjust Menu. (The Color Balance in X3 looks like a redo of Auto Color Balance in PSP9 which I never used, but I'll have to try the one in X3.)


I reworked Menus and grouped more items together so the pull down lists would fit on my laptop screen.
I also reworked the Tools Toolbar quite a bit, adding items and rearranging them.
Then File, Workspace, Save.
View, Customize, Menu Tab, Reset to restore default menus.

Now if I could replace the icons on the Tools Toolbar with more readable ones I'd be really happy. In the same Customize area under the Options Tab there is a Large Icons option. I don't like them larger and taking up more space, though. I'd just like the small ones easier to read.

As mentioned previously, View Menu, and uncheck Use Graphite Workspace Theme helps readability tremendously.

Ctrl/Shift/V is paste as new image. Ctrl/V is paste as new layer.
View, Customize, Keyboard Tab to change that if desired.

Other observations so far:
The Crop Tool behaves differently. It's always on and I have to clear it, which I dislike.

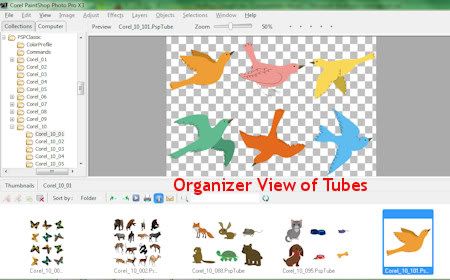
Tons of tubes. Some new frames.

To view those files in Organizer, change the preference settings:
File, Preferences, General Program Preferences, Organizer, Excluded Items, Uncataloged Folders
Delete:
C:\Program Files (x86)

Tubes location:
C:\Program Files(x86)\Corel\Corel PaintShop Photo Pro\X3\PSPClassic\Corel_10
Frames location:
C:\Program Files (x86)\Corel\Corel PaintShop Photo Pro\X3\PSPClassic\Corel_09
Patterns location:
C:\Program Files (x86)\Corel\Corel PaintShop Photo Pro\X3\PSPClassic\Corel_08
etc.

The advantage of viewing tubes within Organizer is that you can see all the tubes in a tube file at a glance. I don't think that is possible any place else.


Not much for brushes or presets, but I have all my previous versions goodies.
I think stuff can be dug up at the old Jasc site yet? There were tons of freebies available there at one time. I think the bonus packs are called respacks2 and 3 exe? They installed when I had PSP9 installed and ran them. I think animation shop can be found there, tubes, frames, tuts, presets, etc. Worth digging around in there.
ftp jasc.com

I noticed Saturation was added to Fill Flash. I haven't used that yet, but I'm thinking that's a good thing.

Clarify (PSP9) is called Local Tone Mapping in X3. It might behave differently too, I haven't played with it much yet.
Discussion here and here.

I thought at first that a lot of the previews were eliminated from the popup menu settings of version X3, but then I finally realized that I can click the word "preview" at top left and the previews drop down. Oh! Also look for "Advanced options" checkmark drop downs as well. Some of the Random buttons are gone. Not really needed on Color Balance, but I do miss Random on Colorize.


Plugins need FM Patcher to work in Windows 7.

Use Font Thing to view and open uninstalled fonts for use within Paint Shop Pro. Used to be able to do this just by clicking and opening a font (Win XP). But that doesn't work in Windows 7. Download the zip with no install utility. I think Windows 7 has problems with the install utility and won't install it if that zip is used.

Offline help:
I couldn't find a *.chm help file in my Corel directories on my hard drive. There is a pdf help file on my hard drive (says version X2) and there are some available online (say version X3), all have the same filename.
Filename: Corel PaintShop Photo Pro.pdf
Google it.

PSP YouTube channel

Wednesday, August 18, 2010

Medora Trip - Butterflies


I think these both drill down to Genus Colias:
Order Lepidoptera - Butterflies and Moths
Superfamily Papilionoidea - Butterflies (excluding skippers)
Family Pieridae - Whites, Sulphurs, Yellows
Subfamily Coliadinae - Sulphurs and Yellows
Genus Colias

Then maybe:
Species Colias philodice - Clouded Sulphur
Also called Common Sulphur or Yellow Sulphur
OR
Species Colias eurytheme - Orange Sulphur
Also called Alfalfa Sulphur

I picked the most common species.

Most Common Butterflies in North America

Medora Trip Notes and Photos

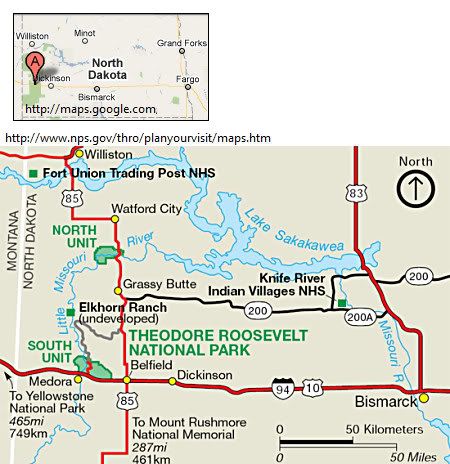
Theodore Roosevelt National Park


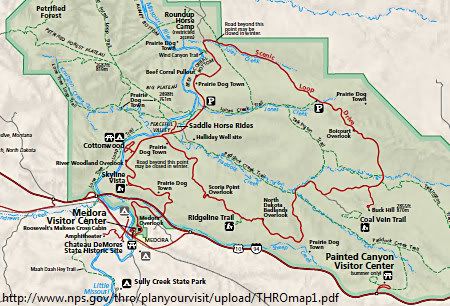
Stopped at Painted Canyon Visitor Center 7 miles east of Medora, North Dakota off I94.
Toured the South Unit 36 mile Scenic Loop Drive (entrance is in Medora, ND.)
Fee $10.00
We didn't take any extended trails.
Took us about 5 hours? maybe.
I packed a picnic lunch and we ate there.


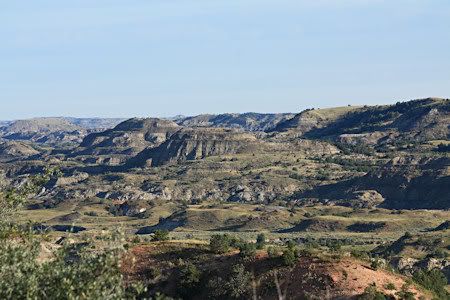
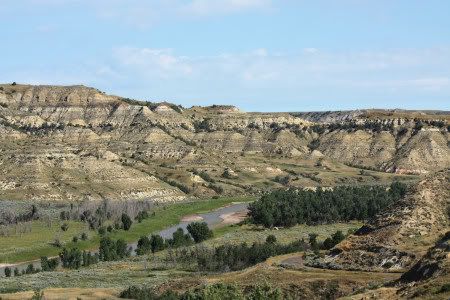
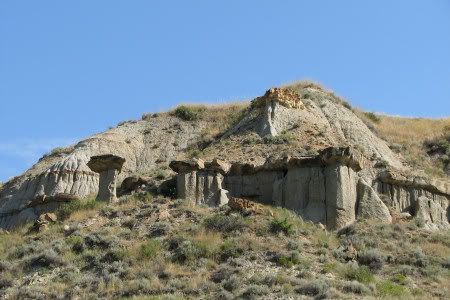
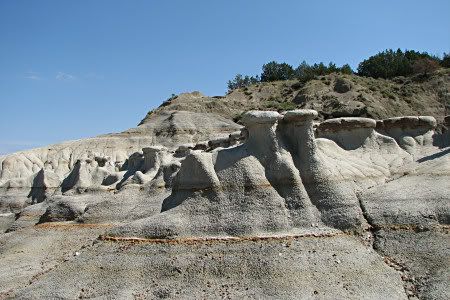
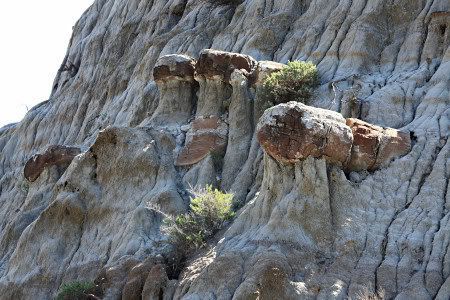
From a photographer's viewpoint I thought all the scenery photos were going to look pretty much the same. And I was right. I used my telephoto quite a bit just to get some different views/perspectives. The two above scenery pics were telephoto. Wide angle shots really need to be viewed at large size to get the grand vast space feel of the place. (Google it)

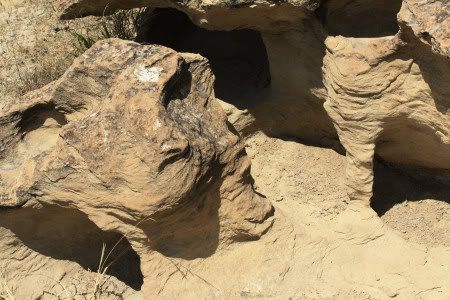
Here are some telephoto textures and formations shots:


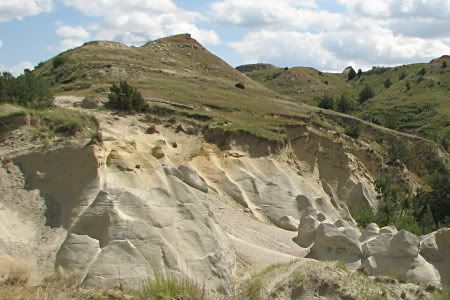
These next were taken at Wind Canyon (marker 25.1). Worth the hill climb for the views.


Another hill worth climbing is Buck Hill (marker 16.4).

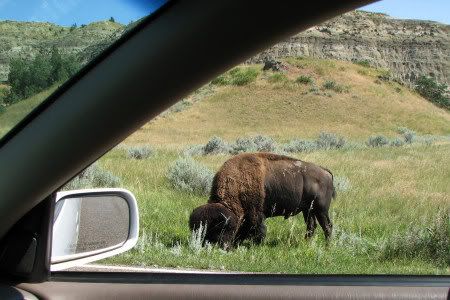
We saw lone buffaloes here and there from far away. Then there was one grazing right by the road and totally uninterested in us as we stopped right beside him, rolled down the windows, and took pictures from within the car.


The "wild" horses along the road weren't so wild. They didn't move when we drove up to them. In fact, a mom and colt came out and stood in the middle of the road, colt nursing, while we were right there.


Took some pics of the prairie dogs, of course.


That's about it for photography, add a few butterflies.

Maps


See also
Index
The South Unit Trail Guide

New Laptop - Notes

I'm going to log more notes about my new laptop experience.
HP Pavilion dm4-1065dx

Blogged here first.

Dual Monitors
I hooked up my old
17" 1704FPT Dell Ultrasharpe Digital Flat Panel
to my laptop for photo editing purposes.
Google it for documentation online.

AND
HP Pavilion dm4 monitors multiple
Google it for documentation online.

I was using the DVI cable on my old computer, so all I had to do was hook up the VGA cable to monitor and laptop.
Then use laptop keyboard function 4 key for switching to dual monitors modes.
Also, right click desktop in Windows 7 and choose Graphics Properties
Tweak:
General Settings
Multiple Displays
Color Enhancement

My old monitor has a warmer color tone and is brighter than my laptop screen. The colors are more washed out on my laptop. Turning gamma down enriches the colors.

Sometimes I had to press the minus (-) button on my old Dell monitor to get it to display what was on my laptop. So the dual monitor modes are a little quirky to work with. I haven't quite figured out the Extended Mode. I think I should be able to work with two different views in that mode. Duplicate Mode displays same on both.

PaintShop Photo Pro X3 (PSPPX3)
I installed the trial version and the first hurdle I had to get over was the black background white text interface. Extremely difficult to read on my laptop. I looked in File, Preferences first and tweaked settings there, but could not find anything on the interface. But alas, I found where I can switch the interface. View Menu, and uncheck Use Graphite Workspace Theme. I haven't used PSPPX3 much yet, but so far I like it. I kinda like the new Organizer. I can view the EXIF info from there and I like that for my photography. I have the old Browser in Paint Shop Pro 9. I've heard so many negative things about Paint Shop Pro since Corel bought it from Jasc, I was real hesitant to try it.

Microsoft Office 2010 Home Edition
I have Word, Excel, Powerpoint, One Note, and Tools
So far I've only worked in Word and I'm liking that quite a bit too. At first the ribbon interface looks really busy--too much info squeezed on there and it took some time to find things. But after I found out I can right click anything and add it to the Quick Access Toolbar at top left of screen, that made things a whole lot easier and faster to access.

I really like all the added features under the Insert Menu. I can do a lot with photos right within Word. I looked in File, Options and tweaked those settings quite a bit. Turned off all the automatic stuff, so no surprises. I created a macro to paste unformatted text with ctrl/alt/v key combo.

Windows 7
So far Windows 7 has been easy to use and I like it. With Windows Media Player 12, I missed the Advanced Tag feature right away, gasp. And a whole lot of tags are just simply gone and no longer editable. Wow. I thought the album art was kind of a train wreck since it wasn't accurate and didn't work when I tried to change it. I'm still trying to figure it out. I think if I paste in my own album art, I still have to update it for it to take effect maybe? It's quirky. I'll go in and change some album art on one song and WMP12 will add that same album art willy nilly to a bunch of songs with different artists. Hello? It kept doing that. I finally just gave up on it. I usually just click on the Title Column to get a compact list of all songs. The album art icon shrinks down to tiny size and I can just ignore it.

Laptop Speakers
The sound is noticeably "tinny", not the best speakers.
Click volume icon on Taskbar and select Computer icon to get Speakers and Headphone Properties.
Under the Enhancement Tab, checkmark Boost Base and then tweak the settings. This helped the sound quality somewhat.

I may edit and/or add to these notes later.

Thursday, August 12, 2010

Hewlett-Packard Laptop Wallpapers

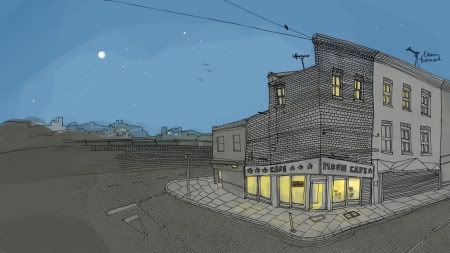
I love some of the Hewlett-Packard desktop wallpapers I got with my new laptop.
My fav:


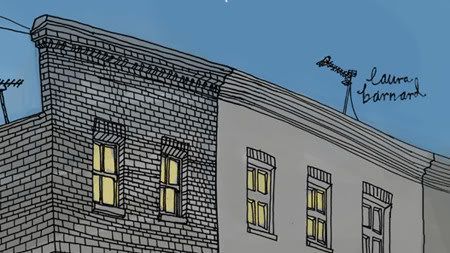
It is signed by an Illustrator artist named Laura Barnard.


She gives info on other artists, yay:
HP Artist Wallpaper Series
"I was proper delighted to be asked to design a set of desktop wallpapers for HP to be shipped with their 2010 range of laptops, and was even more delighted when I discovered I was in splendid and esteemed company with three other great illustrators:

Alex Eben Meyer,


Julie West


and Amy Ruppel. . ."


"...available for download here. . ."

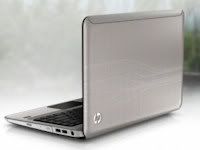
Also I noticed a few of the HP wallpapers mimic the design etched on my laptop.


I wonder who created it and if there is a story behind that?

New Laptop


I bought an HP Pavilion dm4-1065dx laptop and went wireless home network.
Yay!
This is my first laptop, so lots to learn.
I bought the new MS Office 2010 which has the ribbon interface. Yikes.

I LOVE the portability of this little laptop and think it's the perfect size for me.
The function keys are different. It took me the longest time to figure out how to get f12! That's the wireless connection. If I want the regular f12 I have to use the fn key + f12. The fn key is at lower left. HP User Guide says function key behavior can be changed using setup utility (BIOS), but I haven't looked at that.

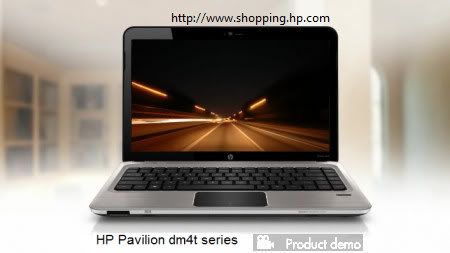
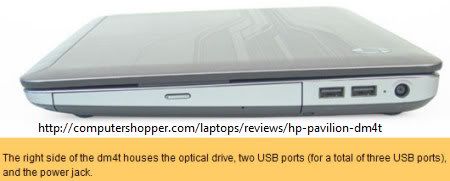
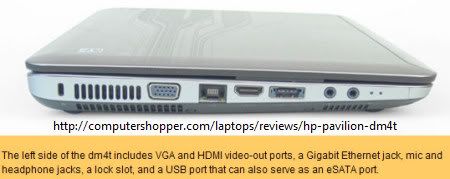
I thought computershopper had a good review of the HP Pavilion dm4t.


I can't plug anything in to that third USB port on the left side so it is different than a regular USB port. (UPDATE: The port DOES work as a USB port, it is just a very tight fit.)
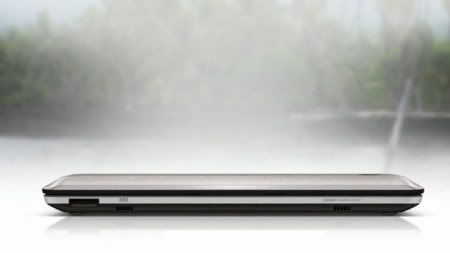
The card reader and speakers are on the front of laptop.
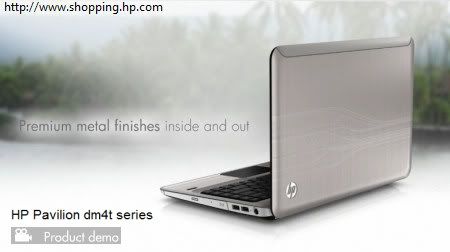
HP pics are more color accurate than computershopper review pics.
To me, the laptop is kind of a taupe beige with slight pink overtones. The color can look more gold than pink in my home lighting. I think it's unique and pretty.

More review discussion at notebookreview forum
Laptop Forums and Notebook Computer Discussion > Notebook Manufacturers > HP, Compaq and Voodoo PC > HP Pavilion Notebooks
HP dm4t Review
05-29-2010

Google it

HP
HP Pavilion dm4t series
UPC: 8 84962 73370 7


My Specs.:
HP - Pavilion Laptop
Intel® Core™ i5 Processor
14" Display
4GB Memory
500GB Hard Drive

Notes:
I got the low end Intel graphics so not a gaming machine, but better graphics are available, see the HP site.
Other possible cons are no backlit keyboard, no blue-ray disc drive. And the drive latch is tough to open. I have to press hard with my fingernail to get the thing open. I've even resorted to using Windows Explorer Eject.

I went from a 1024x768 17 inch screen to a 1366x768 14 inch screen and the text is significantly smaller. I can't imagine using the even higher resolution screens you can sometimes get with the new laptops. The text would even be smaller yet on those.


Other stuff I bought:
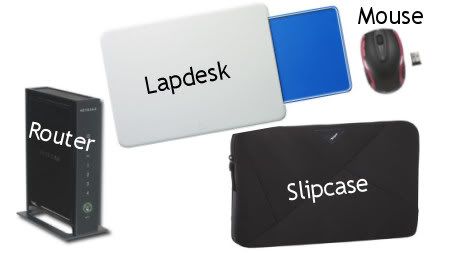
Rocketfish Nano Wireless Optical Mouse
Logitech N315 Lapdesk
Targus A7 Slipcase Laptop Case
NetGear Wireless-N Router

The only problem I had with the router installation is the website menu had TWO "wireless settings" areas and I was in the wrong place for a while struggling to figure it out. I also had to tweak my ISP settings, so good to have all of that info before setting up the router.
No need to use the CD disc included in the package, can just go online.
On my HP laptop, after the Cntrl Panel setup stuff, I had to press the f12 key to open a network, and the little light on the key turns bluish white when the wireless connection is on. I took screenshots of everything as I went along, so I could remember what I did.

Something I hadn't known about Windows 7 is that if you use an old 32 bit software program *everything* changes to a Windows 7 basic theme, which is pretty ugly. It looks like an old Windows 98 environment. I knew a 32 bit program would revert back to an older theme interface, but I hadn't realized everything changed to that mode. I use Paint Shop Pro 9 (PSP9) all the time which means I'm always working in that old interface mode, yuk. So I'm going to try the newer version of Paint Shop Pro.