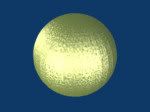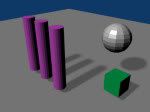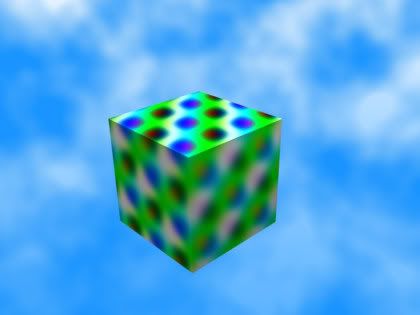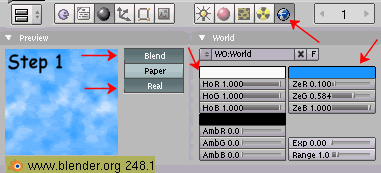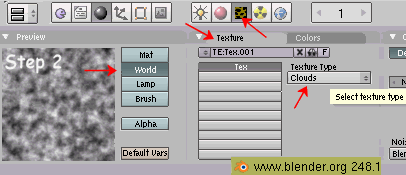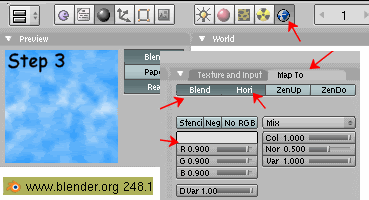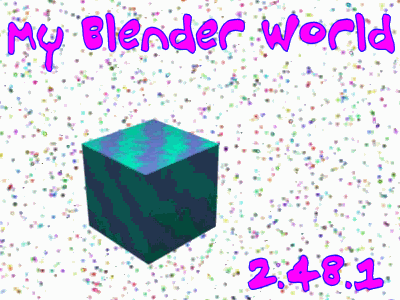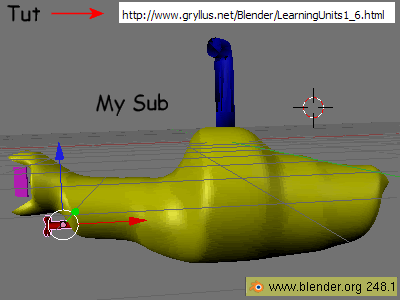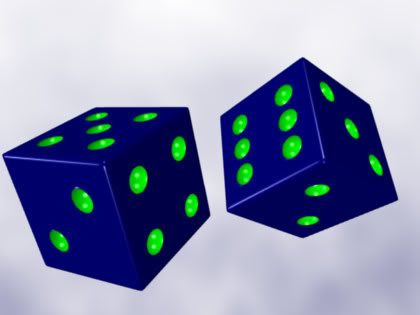
So this is the nicest thing I've created in Blender so far. (Working thru Hirsig's Blender 3D Tuts.)
An animated Rubik's cube would be fun to make someday.
NOTES:
Again, the MyBlender.blend file mentioned in the tut is from Unit #3.
I liked how the spheres/dots were moved to a different layer so they were out of the way.
Here's the front perspective view (wireframe) once all the spheres are created and in position. It shows how cluttered the view can get when working with a lot of objects.
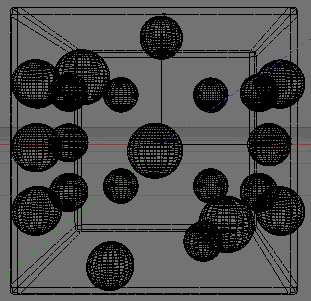
I liked the reminders to use different views to make sure the objects are in correct position. That is something to get used to when working in 3D.
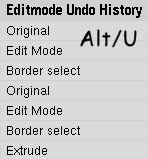
I had to attempt the Join command (Ctrl/J) 3 or 4 times before I got it to work. "Join" shows up in the Undo History (Alt/U) when it actually works. Plus another easy way to tell if join was successful is when you select the object, all the pieces (dots) should be selected with one click.
The other odd behavior was with the Difference command (W). It is opposite of what the tutorial says. Select the cube FIRST, then select the Spheres.
I get lost on what Mode I'm supposed to be in - Object or Edit (Tab toggle), and if I'm supposed to be in Wireframe or Solid (Z key toggle). It's not always clear and it does make a difference.
I noticed jpg within Blender is higher/poorer compression (more artifacts) than optimization 20 within Paint Shop Pro 9.
So I saved the render as png within Blender and then saved as jpg within Paint Shop Pro (or whatever software to get a better quality jpg if desired).
png on the net is usually overkill.
jpg w optimization at 10-20 is usually all I need, if I don't want gif.
Unit 6 is where the world background info is. I already had figured that out earlier because I wanted a nicer background for my renders than that default dark blue.
Also talks about Subsurf.
Then discusses Booleans which is combining objects in different ways (difference, intersect, union) kinda similar to Inkscape I think.
I'm finished with Unit #6, on to Unit #7.
Tuesday, March 31, 2009
Friday, March 27, 2009
Blender - Materials, Lighting, Bezier Curve
I'm still studying Blender 3D software.
Worked thru Unit 4 - Coloring, Materials, Camera, Animation.
GOOD. Lots of good information here.
There's the Color Picker for choosing specific colors, which I hadn't realized was there.
There is how to lock the camera on an object which was an important tip to learn.
Introduced to the Ipo Curve Editor Window used for Animation.
The Materials pdf and sample blend file is very detailed on how to add effects like gold, silver.
NOTE: Main Index Page of Hirsig site has extra tutorials not found when following the Learning Units Links.
One that is relevant to Unit 4 Animation is entitled: "Creating An Animated GIF"
Just finished Unit 5 videos.
Lots of good info on lighting in this section.
I set up 4 views while working thru Unit 5.
There are NEW added options in my newer version Blender 2.48.1.
He always activated Add, Lamp in Top View so the lamp pointed down on the scene.
Then switched to Side View and moved it.
Default Lamp Scene has Shadow On. Shadow is Off on new lamps added.
You need Camera View to see what you will get when you render.
Then you need to render to see the light effects.
The Spot Lamp was the most complicated and acted differently than his.
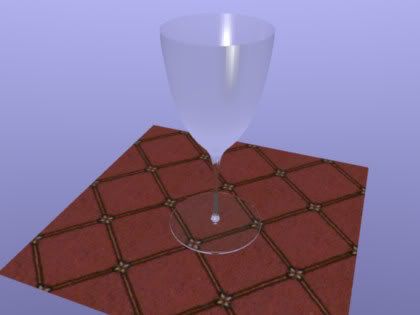
The wine glass pdf tut using the Bezier Curve was difficult to follow. He refers to a "MyBlender" file which is found in Unit 3.
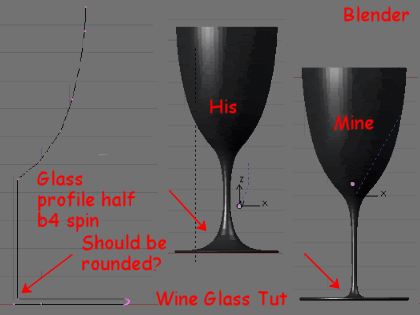
His Front View is my Top View. I slogged thru in Top View and then right before creating the plane I rotated the glass.
I couldn't figure out what he was doing with the Bezier Curve from the pics provided. I did a screenshot of his glass profile half before spin and imported that into Blender and used it as a guide (View, Background). I eventually found out that his stem was different (more rounded going up).
Worked thru Unit 4 - Coloring, Materials, Camera, Animation.
GOOD. Lots of good information here.
There's the Color Picker for choosing specific colors, which I hadn't realized was there.
There is how to lock the camera on an object which was an important tip to learn.
Introduced to the Ipo Curve Editor Window used for Animation.
The Materials pdf and sample blend file is very detailed on how to add effects like gold, silver.
NOTE: Main Index Page of Hirsig site has extra tutorials not found when following the Learning Units Links.
One that is relevant to Unit 4 Animation is entitled: "Creating An Animated GIF"
Just finished Unit 5 videos.
Lots of good info on lighting in this section.
I set up 4 views while working thru Unit 5.
There are NEW added options in my newer version Blender 2.48.1.
He always activated Add, Lamp in Top View so the lamp pointed down on the scene.
Then switched to Side View and moved it.
Default Lamp Scene has Shadow On. Shadow is Off on new lamps added.
You need Camera View to see what you will get when you render.
Then you need to render to see the light effects.
The Spot Lamp was the most complicated and acted differently than his.
The wine glass pdf tut using the Bezier Curve was difficult to follow. He refers to a "MyBlender" file which is found in Unit 3.
His Front View is my Top View. I slogged thru in Top View and then right before creating the plane I rotated the glass.
I couldn't figure out what he was doing with the Bezier Curve from the pics provided. I did a screenshot of his glass profile half before spin and imported that into Blender and used it as a guide (View, Background). I eventually found out that his stem was different (more rounded going up).
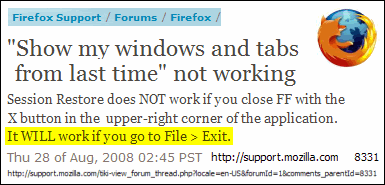
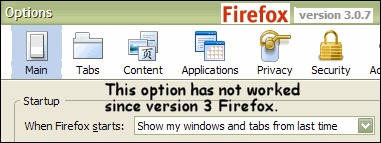
Firefox Mystery Solved
Well, one Firefox mystery finally solved.
Firefox Link:
"Show my windows and tabs from last time" not working
My other wishes:
1. Save duplicate bookmarks with Ctrl/D.
2. Open tab next to current tab.
(Plugin does not work with version 3 Firefox.)
Tried Google Chrome.
Can't live without my Firefox NoScript and AdBlock.
Firefox Link:
"Show my windows and tabs from last time" not working
My other wishes:
1. Save duplicate bookmarks with Ctrl/D.
2. Open tab next to current tab.
(Plugin does not work with version 3 Firefox.)
Tried Google Chrome.
Can't live without my Firefox NoScript and AdBlock.
North Dakota Flooding
Flooding is dominating the North Dakota news this past week.
Lots of snow this winter combined with a quick thaw and river ice jams are the main causes.
The general news media has focused on Fargo and the Red River, but the flooding is statewide.
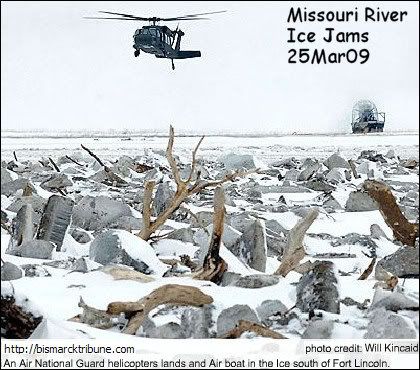
Salt (to soften) and explosives were used on the Missouri River ice jams (Bismarck).
Very unusual situation. I don't remember that ever happening before.
The Heart and Knife rivers flow into the Missouri bringing large chunks of ice.
The TV news conference said the ice was about 3 feet thick and some chunks about the size of a vehicle.
I heard 100 mile ice jam, but one specific area South of Bismarck caused flooding in town. And another ice jam North Bismarck is an area of concern.
Explosives seemed to get things moving again and the Missouri has gone down.
Some handy things I've found online to track the statewide flooding:
Layer the Map of North Dakota Cities
on top of the
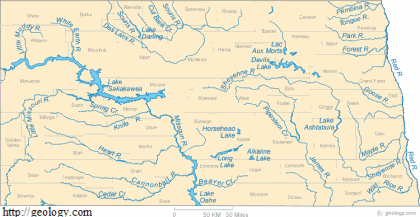
North Dakota Rivers Map
Set Layer Blend to Multiply and viola can see the towns, counties, rivers.
Handy.
I used Paint Shop Pro 9 to layer, but can use any software capable of doing layers.
I don't see the city of Wahpeton on the map, though. It is SE corner along the Red River.
The Red River is unusual because it flows up instead of down.
So crest at Wahpeton, then Fargo, then up to Grand Forks.
Grand Forks built a new dike system after the flood of 1997 so I don't think they are worried up there.
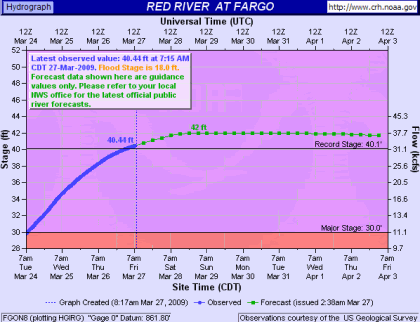
Hydrographs at crh.noaa.gov tells you the cresting status on the various rivers in North Dakota, track by city.
The Red is still cresting and has already surpassed the record flood stage. Looks like most other rivers have already crested.
The website is a little difficult to navigate and find what you want. Look for the hydrographs. Here's a few main links:
Central ND
Eastern ND
Google ND Newspapers for news.
Just some of the towns mentioned in the news with flooding problems (generally from West to East):
Hazen/Beulah - Knife River
Mandan - Heart River
Bismarck - Missouri River
Linton - Beaver Creek
Fargo - Red River (Wahpeton, Grand Forks are along the Red also.)
There are more.
Some of the smaller towns get overlooked.
You probably won't hear about the farmers who had to be lifted out by helicopter cuz the roads washed out.
If you like Twitter, #ndfloods tag will probably take you to everything that's on Twitter.
See also North Dakota Road Conditions
Thursday, March 19, 2009
Wednesday, March 18, 2009
Blender Clouds, Hair, Interface Changes
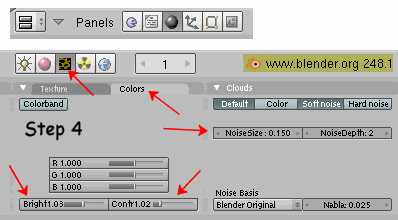
The goal was a nice textured background for my objects.
Video Tut
How to make sun and clouds.
Keepvid to save it to hard drive.
Search vimeo for more Blender tuts.
I did not do the sun part. The tut video is in 2.45.15 version Blender. I think my newer Blender 2.48.1 version has a special feature for sun?
I want to study that first.
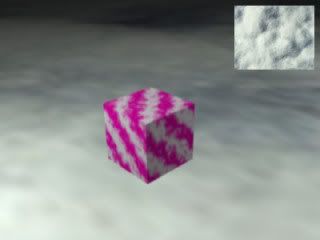
Hirsig's Unit 4 Snowman Tut creates a plane and them adds an image texture of snow for the ground. (I did not do the snowman and trees stuff.)
This looks more like clouds, than snow. But another way to add that to your scene. (Note: Also relevant in Unit 4 are the video lessons on Blender Material Basics, Colored Material, and Color Picker. I'm working thru Unit 4 right now.)
Then I looked at this old tut also.
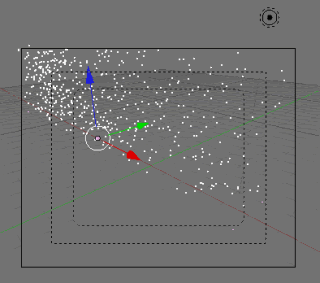
Particle-Based Clouds
Particle Interface area of Blender got a significant update in version 2.46 so the tut is a little difficult to follow.
There is no Static button in version 2.48.1.
And have to Alt/A (animation) to actually see that snowy particle stuff on screen.
Somehow Blender was creating folders on my hard drive. I made the animation only one frame long instead of 250 frames and that seemed to stop it.
Here's what my rendered clouds looked like. Not too exciting.
Then viewed:
Super3boy's 26th video
(2.46 Hair, UV, and Grass)
About 3:30 minutes into the video is the "where's the Static button?" part.
This has to do with the Blender interface changes.
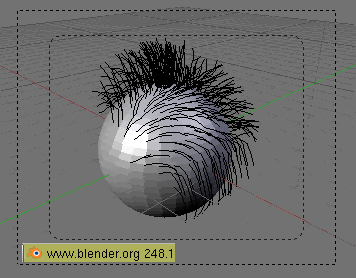
Also, he shows you how to make hair and comb it, which was fun.
Tuesday, March 17, 2009
Blender - My World
So things were getting entirely too seriously sloggy around here with learning Blender.
Time for a little F-U-N.
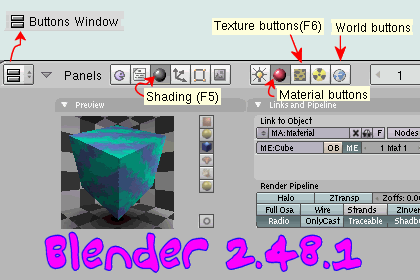
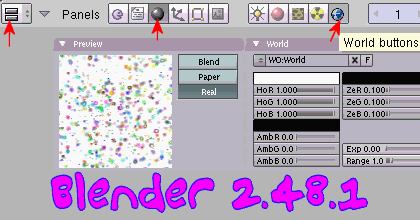
I started poking around in the textures and shading areas of Blender...
Text added in Paint Shop Pro.
I think this may be where I could create a nice cloud background for my renders?
Will have to do more playing in this area.
Time for a little F-U-N.
I started poking around in the textures and shading areas of Blender...
Text added in Paint Shop Pro.
I think this may be where I could create a nice cloud background for my renders?
Will have to do more playing in this area.
Blender - Vase Tut
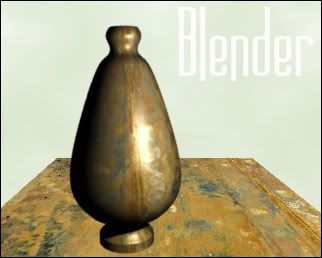
Ah, the vase was WAY easier to create than that submarine.
The vase is "sitting" on the same texture used for the vase. Deformed and layered in Paint Shop Pro.
The "wall" or background is soft cloud texture.
Yeah, I know, shading needs some work if I add this stuff, but nah.
If I would be more experienced, I could maybe create the table and background within Blender.
Now this one would have been fun to animate, just have it spinning around slowly so you could see all sides. I don't know how to do that yet, though. I fiddled with rotating X,Y,Z and that would not spin it around, so I think it's more complicated. Like moving the center pivot point and maybe setting a path for it somehow? I don't know.
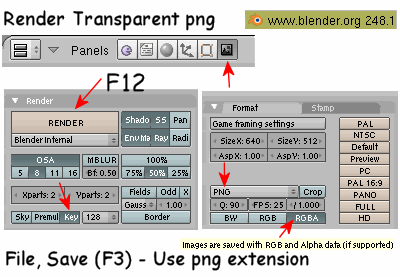
How to render a transparent image? (Not in tut, me and Google figured it out.)
Vase Tut Unit 3
Monday, March 16, 2009
Blender7 Shortcut Keys
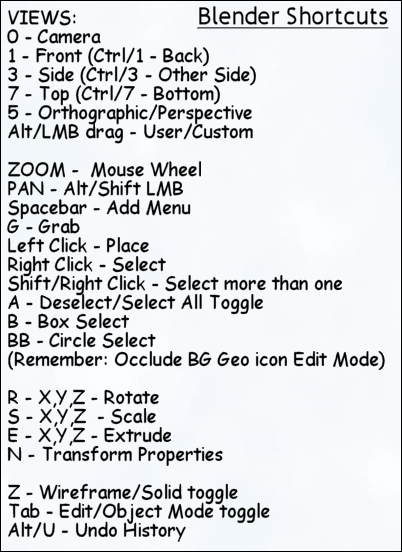
At this point, there are some obvious shortcut keys that I'm using over and over again.
There are multiple ways to zoom and pan. I picked a few I prefer to use and memorized just those for now.
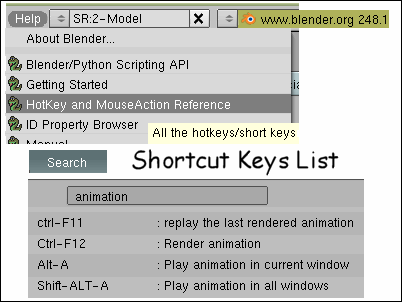
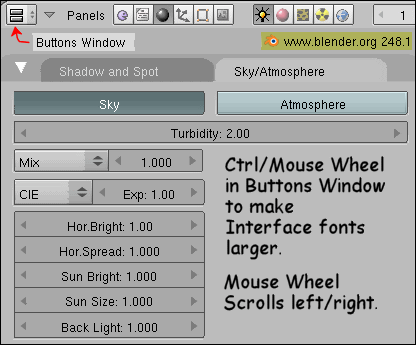
Here's my list as image to print out for anyone who might want it.
I printed it out and taped it up by my monitor.
There are multiple ways to zoom and pan. I picked a few I prefer to use and memorized just those for now.
Here's my list as image to print out for anyone who might want it.
I printed it out and taped it up by my monitor.
Blender6
Some important things I've learned.
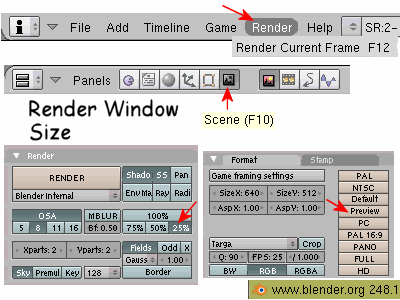
Render (F12) window is by default too large and sluggish.
Scene Icon at bottom (F10) gives you some options to control that Render window.
Look for "Preview" Icon bottom right of screen.
Also 25%.
Those combined will give you a tiny render popup window when you press F12.
I've been using the Render window to preview the lighting that I add or adjust.
The default lighting in Blender seems too dark.
Adding a Hemi light and then moving and rotating it dramatically increases the lighting. (You add Lighting the same way as you add Objects.)
Included in the Submarine Animation pdf tut files is a Blender Starter file already set up with Hemi lights so that all objects on screen are well lit. Something to take a look at. (See also Unit 3 My Blender PDF Tutorial same link.)
I was exhausted after working thru the Submarine tutorial. I'd recommend working thru the 1st 3 Units videos BEFORE doing that Submarine, because a lot of the stuff you have to do in the tut is covered later, in Units 2 and 3.
My submarine periscope surface looked crappy.
I could not get my propeller to rotate around correctly in the animation. RotY was definitely wrong (up/down). Rot X and Z did the same thing which was weird (back and forth).
I suspect both those problems originated when I was creating them and I was not going to go back to square one and recreate them.
So I quit at that point, which was actually almost to the end of the tut.
It is difficult to tell what the objects are supposed to look like when you first add them to your scene. Mine do not import the same way as the tut, so I have to guess. This results in editing errors because I'll be working on the wrong side or the wrong vertices and won't know it until later.
I compared the three versions of the yellow submarine tut available online and the one located at gryllus.net is newer than the ones at Tufts. (See previous post.)
I finally found out about the Undo History (Alt/U). Yay! I would teach newbs that tip right away. This helps me tremendously. I don't like Ctrl/Z undo in Blender because sometimes it works sometimes it doesn't and it's easy to lose my place in the process. The Undo History teaches me what is logged as "undoable" and what is not. (Colors? No Views? No) And also tells me where I'm at in the Undo history.
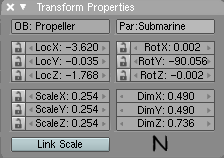
I liked using the Transform Properties window (N) to play with rotate and scale of objects because it tells you exactly where you are at and which coordinate you are manipulating. Good teaching tool. I get lost just using R or S - X,Y, Z shortcut keys. Transform Properties window is accessed with the N key. N for Notation, evidently.
So after struggling with the Submarine tut, I breezed thru Units 2 and 3 videos. Next up, I'm going to try creating that vase in Unit 3.
It looks like it has some texture applied to it and I want to learn how to do that in Blender.
I'm also wondering how to color only part of an Object. And then there's a lot to learn about lighting yet.
I tried creating 3D text in Blender. That feature gave me reboot crashes. Blender only uses PostScript fonts. That was a surprise.
Free PostScript fonts here.
I'm googling for interesting ideas on what I could create in Blender. I want something that's fun to make and will motivate me to keep at it because so far it hasn't been real pleasant trying to learn Blender.
I'm not all that interested in animation at this point. I think that will be more fun when I have something nice enough to animate.
I do like working in 3D because it surprises me what the scene looks like in different views. It's a whole new world.
Render (F12) window is by default too large and sluggish.
Scene Icon at bottom (F10) gives you some options to control that Render window.
Look for "Preview" Icon bottom right of screen.
Also 25%.
Those combined will give you a tiny render popup window when you press F12.
I've been using the Render window to preview the lighting that I add or adjust.
The default lighting in Blender seems too dark.
Adding a Hemi light and then moving and rotating it dramatically increases the lighting. (You add Lighting the same way as you add Objects.)
Included in the Submarine Animation pdf tut files is a Blender Starter file already set up with Hemi lights so that all objects on screen are well lit. Something to take a look at. (See also Unit 3 My Blender PDF Tutorial same link.)
I was exhausted after working thru the Submarine tutorial. I'd recommend working thru the 1st 3 Units videos BEFORE doing that Submarine, because a lot of the stuff you have to do in the tut is covered later, in Units 2 and 3.
My submarine periscope surface looked crappy.
I could not get my propeller to rotate around correctly in the animation. RotY was definitely wrong (up/down). Rot X and Z did the same thing which was weird (back and forth).
I suspect both those problems originated when I was creating them and I was not going to go back to square one and recreate them.
So I quit at that point, which was actually almost to the end of the tut.
It is difficult to tell what the objects are supposed to look like when you first add them to your scene. Mine do not import the same way as the tut, so I have to guess. This results in editing errors because I'll be working on the wrong side or the wrong vertices and won't know it until later.
I compared the three versions of the yellow submarine tut available online and the one located at gryllus.net is newer than the ones at Tufts. (See previous post.)
I finally found out about the Undo History (Alt/U). Yay! I would teach newbs that tip right away. This helps me tremendously. I don't like Ctrl/Z undo in Blender because sometimes it works sometimes it doesn't and it's easy to lose my place in the process. The Undo History teaches me what is logged as "undoable" and what is not. (Colors? No Views? No) And also tells me where I'm at in the Undo history.
I liked using the Transform Properties window (N) to play with rotate and scale of objects because it tells you exactly where you are at and which coordinate you are manipulating. Good teaching tool. I get lost just using R or S - X,Y, Z shortcut keys. Transform Properties window is accessed with the N key. N for Notation, evidently.
So after struggling with the Submarine tut, I breezed thru Units 2 and 3 videos. Next up, I'm going to try creating that vase in Unit 3.
It looks like it has some texture applied to it and I want to learn how to do that in Blender.
I'm also wondering how to color only part of an Object. And then there's a lot to learn about lighting yet.
I tried creating 3D text in Blender. That feature gave me reboot crashes. Blender only uses PostScript fonts. That was a surprise.
Free PostScript fonts here.
I'm googling for interesting ideas on what I could create in Blender. I want something that's fun to make and will motivate me to keep at it because so far it hasn't been real pleasant trying to learn Blender.
I'm not all that interested in animation at this point. I think that will be more fun when I have something nice enough to animate.
I do like working in 3D because it surprises me what the scene looks like in different views. It's a whole new world.
Wednesday, March 11, 2009
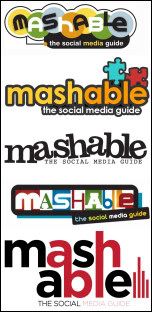
Mashable Logo Design Contest
(More contests at that website, also.)
These are fun to look at.
They are really pouring in fast.
Interesting to see what people come up with.
(Some of my favs to the right.)
Spell the word wrong?
Don't follow guidelines?
Play on the Mash TV show.
Play on the McDonald's big M arch.
More Info at Mashable.
Contest open March 10th until March 24th.
Designs must include the words “Mashable” and “The Social Media Guide.”
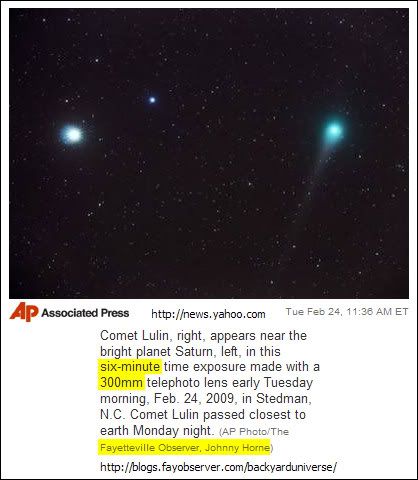
Comet Lulin
I found this at Yahoo news.
What struck me was the 300mm lens to take this picture of the comet.
I don't know about the six minute exposure time?
I found the photographer's blog and he has more pics with details, which is interesting. Pics have the EXIF.
I'll have to do some night sky photography this summer with my XSi camera and 300mm lens just to see what I can get.
I'm pretty lazy about setting up the tripod. So much work. And I think I need a sturdier tripod for my XSi setup. The one I have works fine with my S3.
Direct links pertaining to Comet Lulin:
Comet Lulin, Saturn and a satellite tonight…
Says:
"the comet was 38 million miles away."
"300mm lens brings objects about as close as a pair of binoculars."
Comet Lulin closes in…
Comet Lulin in the sky and online
Comet Lulin last night…
Says: "Nikon D300 digital camera and a 300mm telephoto lens for the 3 minute exposure."
Monday, March 09, 2009
Googling My Blender Instructor
So I was congratulating myself for having worked thru 14 Blender tutorials and then realized that was only Unit 1 of 12 Units currently available at that website.
AND
I still needed to make the yellow submarine animation from Unit 1 yet.
This tutorial site is HUGE. I had no idea. That is a whole lot of work someone did.
I decided to google my Blender Instructor...
Let's see..
First Stop
He got his M.F.A from U of Montana in 1979.
He's a Senior Lecturer at Tufts University.
He's 56 years old.
He says:
"I have been teaching courses in 3D Design at Tufts University for many years. Two years ago I switched from 3D Studio Max to Blender as the primary software employed by my students. Since then, I have developed a rather comprehensive set of online learning materials which focus on understanding the basic Blender functionality and strategies for applying Blender modelling to a creative design challenge. The course material contains weekly learning units consisting of over a hundred video tutorials, some 25 PDF tutorials, course projects and examples of prior student work...."
Etc, Links to:
Tufts University Open Course Ware site
Course 28
Three-Dimensional Modeling, Animation and Rendering using Blender 3D Software:
Wow, more tuts and stuff.
There's a NEWER version
Course 57
Yet MORE tuts and stuff.
Tufts University vs Tufts Open Course Ware University?
Tufts has three campuses in Massachusetts, (1) Boston, (2) Medford/Somerville and (3) Grafton.
Neal Hirsig is listed as Senior Lecturer in
Drama and Dance Dept. at Medford, MA.
What does he look like...
Google Images
Only one teensy pic, no date.
So...I'm a little confused about all those tutorials.
What is the same, what is different.
I guess I'll continue to plow thru the ones I was working on for now.
Sunday, March 08, 2009
Blender4
Still slogging away at learning Blender.
I typed up a shortkey list of what I've learned so far and keep adding to it as I go.
I checked delicious popular blender and found these tuts:
Blender 3D Design Course
From here
watched:
1. Blender Default Scene
2. Splitting and Joining Windows
2. 3D Viewport Navigation
4. Viewport Shading
5. Maneuvering About
6. Blender For Laptops
7. Loading and Saving Files (Backup files)
8. Primitive Mesh Objects (His Front View is my Top View. Does not tell you how to move just the cube when it is part of uvsphere. Must have LMB dragged the arrows on the uvsphere. Which worked at first, then could not move cube independently.)
9. Icosphere - Torus Objects
10. Plane - Grid - Circle Objects (Most intensive so far.)
I downloaded the video to this one in *.swf Flash format. Then right click on it, Open With, IrfanView or Firefox showed up on the list. Worked in both. (Another handy use for IrfanView.)
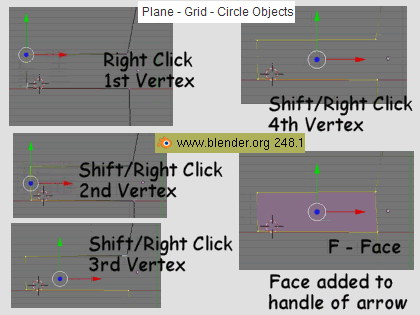
Adding a face to the arrow was the hardest part of the tut.
Shift/Right Click to select more than one vertex. (Tut does not tell you how.)
This is what each phase of the Shift/Right Click should look like if you are doing it correctly.
It's kind of weird.
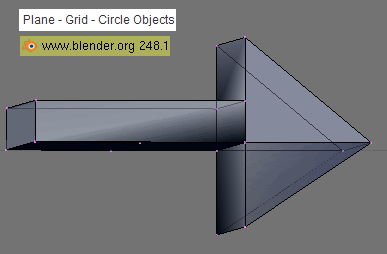
Here's the arrow I made. Sure a lot of work for a simple arrow. I hope it gets more fun and creative soon.
Thursday, March 05, 2009
Nice Desktop Calendar
So I was reading about square root Tuesday (3/3/09) and pi Saturday (3/14/09) when, wait...
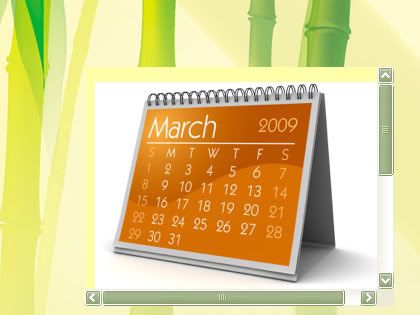
I LIKE that nice little calendar he posted with the article. lol
I put it on my desktop.
I wonder how he made the calendar. Would be nice to create something like that every month for my desktop.
My wallpaper is: wallcoo bamboo.
I LIKE that nice little calendar he posted with the article. lol
I put it on my desktop.
I wonder how he made the calendar. Would be nice to create something like that every month for my desktop.
My wallpaper is: wallcoo bamboo.
The Way Life Should Be - BOOK
I'm on a GOOD book roll. Yay!
I'm reading The Way Life Should Be, (c. 2007) by Christina Baker Kline.
Found THREE of her books at the library and since this first one is good, I'm looking forward to the other two.
I love this story because the protagonist, Angela, essentially starts over in a small coastal Maine town where she knows no one and creates a new circle of friends with an interesting hodge podge of characters. Some/most came in from other areas, so there's that question, "how did you end up here?" and them maybe not knowing quite how to answer that.
Then there's the local library lady who gets to know Angela's reading habits a little TOO well, and Angela's thinking: "in New York I might have contemplated taking out a restraining order at this point, but here I just take the book and sign it out." (pg 140)
Very entertaining read.
I love it when I find good reads that keep me up at night, rather than put me to sleep.
The other two:
Sweet Water (c. 1993) - Abandoned it. Didn't like it.
Desire Lines (c. 1999) - Skimmed it to find out what happened to Jennifer.
New novel, Four Way Stop, coming out in Spring of 2009.
I'm reading The Way Life Should Be, (c. 2007) by Christina Baker Kline.
Found THREE of her books at the library and since this first one is good, I'm looking forward to the other two.
I love this story because the protagonist, Angela, essentially starts over in a small coastal Maine town where she knows no one and creates a new circle of friends with an interesting hodge podge of characters. Some/most came in from other areas, so there's that question, "how did you end up here?" and them maybe not knowing quite how to answer that.
I ask where in New York she lived.
"Gramercy Park," she says, and I know what that probably means...
"And you're here year-round now?"
"Yes," Long silence. "What about you? Will you be staying year-round?"
Now I'm the reticent one. "Umm, well, I don't know. Basically my life fell apart, and here I am."
"Yeah, that's my story, too," she says, smiling. She seems relieved by my frankness. (pg 162-3)
Then there's the local library lady who gets to know Angela's reading habits a little TOO well, and Angela's thinking: "in New York I might have contemplated taking out a restraining order at this point, but here I just take the book and sign it out." (pg 140)
Very entertaining read.
I love it when I find good reads that keep me up at night, rather than put me to sleep.
The other two:
Sweet Water (c. 1993) - Abandoned it. Didn't like it.
Desire Lines (c. 1999) - Skimmed it to find out what happened to Jennifer.
New novel, Four Way Stop, coming out in Spring of 2009.
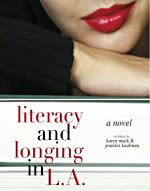
Literacy and Longing in L.A. - BOOK
I wasn't going to blog about this book because at first, I didn't like it all that much. The first part was pretty heavy into the protagonist's book obsession and I didn't want to climb in there with her. It did get better, however, and there were a few things I jotted down from the book.
The funniest part of the book is the chapter where Dora "discovers" the romance genre because a friend gives her a box full as a gift with a notes that says: "Dear Dora, Merry Christmas. I know you're going to love these books! Just try one! You'll see. Love Darlene."
Amanda Quick, Susan Elizabeth Phillips, Elizabeth Lowell, Judith McNaught, Kathleen Woodiwiss, Jude Deveraux.
"Wow! This shit is good," Dora says. lol
She describes some of the stories: (pg 228-9)
"Angry young man, passionate artist, virginal heroin, unaware of her intense, sensual nature until miraculously awakened by the man of her dreams."
"Julia is beside herself with rage. She's fatally attracted to a gorgeous, infuriating man who turn outs to be her betrothed. A dark period when things may not workout but then the lovers see the light, climb the mountains of despair, and fling themselves into each other's arms...all for love."
"I want more," She says.
I loved it.
A few more passages that I jotted down:
(Pg 71):
"Certain passages keep resonating in my head long after I've closed the book, and I often can't wait to get back to the story, as if it were a secret lover."
Context is her musing on a fantasy book club, but I liked that description of a really GOOD book.
AND
(Pg 73):
"Then there are the readers who just want a good old-fashioned story and make no bones about it. They skip over long descriptive passages, skim through digressions, and zero in on who, what, and where to the nth degree. A subcategory of this is people who read books for sex, violence, or any other particular proclivity, and speed read passages that don't interest them."
Uhm, that would be me. Sort of. I definitely skip/skim and/or abandon a book when I don't like what I'm reading.
My hint/tip: On retrospect, I should have paid more attention to Palmer. He's more important than I had thought.
And, in all that "literacy and longing" did any literary reference stand out?
Dorothy Parker: "Tell him I've been too fucking busyor vice versa." (pg 149)
NOTE: See first post on Kaufman and Mack books.
Blender3
UPDATE 21 Mar 09:
See Hirsig's Unit #4 Camera Constraints video. He shows how to lock the camera on an object so you can easily move the camera around and it will automatically look at that object. The YouTube tut below makes the animation much more difficult than it has to be. I would recommend working thru Hirsig's tuts instead. WAY better.
Blender Tutorial Lesson 4
Animation
Notes/Comments:
Right Click on Camera to Select it.
Lock Camera to 1st frame:
I - Insert
LocRot - Locks location and rotation angle of camera in frame 1 so it sits right where it is and puter knows where to find it.
Type 30 where it says 1 for frame.
Now we are on frame 30.
G - grab camera and swing it to a new location.
I, LocRot again to lock camera for frame 30
Now enter 1 to go to frame 1.
0 (zero) to view thru Camera and
Alt/A - Animate
Whoa, hyper vertigo spin.
Did it animate all/some rotations I did to move the camera in position for frame 30?
Yuk!
Moving, rotating, and positioning the camera correctly is just too hard to do for a newb.
I also notice a 250 countdown going on? (Explained further down.)
Went looking for more help...
Wiki Noob Ani
Not written very well, but might be useful laterwith additional info from elsewhere.
Wiki linked to: YouTube Ani Tut
Super3boy's Seventh Blender Tutorial (Animation)
Blah, blah for first few minutes or so, then starts the tut.
Moves the cube instead of the camera, which would be WAY easier for a Newb.
("Super3boy" sounds like he's about 9 years old. Not that, that's a bad thing. hey hey He has 28 Blender tutorial videos up at YouTube, and has since had a voice change.)
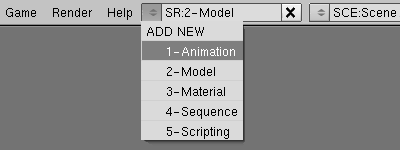
Showed me the Animation Screen Mode. (Menu at top of screen, from Model to Animation.)
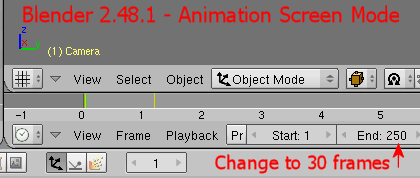
At the bottom I see 250 frames, so Blender creates 250 frames by default. Have to change that to 30.
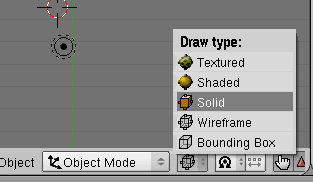
Once in Ani Scrn Mode, I had to change Draw Type to Solid (Mentioned in the YouTube tut).
I didn't mess with animation any further. I'll go back to it once I have more experience using Blender. I did appreciate getting the general idea of how it works in Blender, though.
I need more practice on moving and rotating the camera.
Another thing I find difficult to do is using the mouse wheel to change the plane angle.
A mouse wheel just wasn't designed to use as a press down button, IMO. It's designed to roll/scroll. The alternative was?...Alt/LMB, I think.
At this point, I'm going to type up a list of shortcut keys I want to memorize and then I'm moving to Super3boy's tuts. (Can download the videos along with the Blender project file at link.)
Tuesday, March 03, 2009
Blender2
Blender Tutorial Lesson 3
My Notes:
A - Select/DeSelect All
Zoom In/Out - MMB (Middle Mouse Button)
Pan Up/Down - Shift/MMB
Pan Over - Ctrl/MMB
OR Numbers Pad (These Work in my Windows version)
+/- is Zoom In/Out
Ctrl/6 - left
Ctrl/4 - right
Ctrl/2 - up
Ctrl/8 - down
That was tough getting everything lined up correctly.
I don't know how to undo, so if I screw up, I have to start all over again.
Saving multiple copies.
0 or zero on number pad toggles between my user set view and camera view.
But if I select Side, Front, Top view I lose my user view.
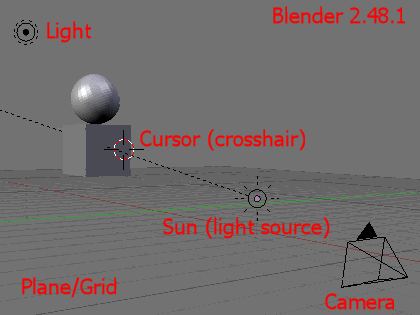
Add a new light source.
Add, Light, Sun
Want the light source or dotted line to "shine" on the cube.
Relevant LINKS:
Interface for Newbs
See also BlenderQuickStart.pdf which comes with the zipped Blender software download.
Coldplay
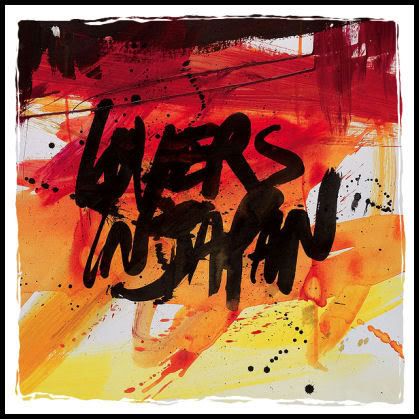
Lovers In Japan, by Coldplay is growing on me and now I LOVE it.
It sounds like a U2 song.
"Where The Streets Have No Name," maybe?
Love the single album art on Lovers In Japan.
Begging for some framing/matting...
I bought Coldplay's Rush of Blood to The Head CD some years ago.
What a disappointment. Boring. All the songs sounded the same.
So they haven't been a favorite group of mine. Kinda blah.
Checking elbo
There's an acoustic version and some kind of mix of Lovers In Japan floating around on the Net.
Checking Wiki
Single released on Nov08.
Album released Jun08.
Huh?
Checking About
The single version of Coldplay's "Lovers in Japan" is the "Osaka Sun Mix," a livelier rendition than what is on the Viva La Vida or Death and All His Friends album.
Oh.
Single Artwork from About.
Viva La Vida, the song, is pretty good.
Some nice pics of the group at Google Images.
Monday, March 02, 2009
Blender
So I thought I'd try Blender 3D open source software for my next learning project.
Yeah, I've heard it was tough to learn.
Whoa.
Download here.
I downloaded the zipped file: blender-2.48a-windows.zip
Unzipped and double clicked blender.exe
I get TWO windows. One is the regular Blender window and another looks like a DOS popup saying I don't have Python installed. I don't know what that means. But it says "continuing happily" so I'm "happified" it's continuing. lol If I close that popup message, however, Blender closes also. (UPDATE: 5Mar09 Explanation - Bottom line is, you do NOT need to download/install Python. Ignore message.)
I'm looking for GOOD Newb tuts, right now.
Some seem to want me to memorize the entire navigational quagmire with shortcut keys before I even begin to make something.
I spent some time poking around and clicking here and there to familiarize myself with the Interface somewhat.
I like to familiarize myself with the Menus when I'm first learning, not just memorize a bunch of shortcut keys.
Can Zoom In/Out with the mouse wheel.
Undo/Redo? Ctrl/Z/Ctrl/Y? Can't find those.
I kinda liked two views instead of just the one.
Right mouse click on the line dividing the two "toolbars" at the bottom of the screen and select Split or Join from the popup.
Then look in the View Menu for your View options.
The bad news with that, though, is you lose some of the menu options on the "toolbar"? They don't wrap, they disappear.
Here's some YouTube Video Tuts that look pretty good. I watched Lesson 1 and 2 so far.
I'm going back to 7th grade now, lol...and try to ignore all the nasal sniffs, lol...
Blender Tutorial Lesson 1 (S,R,G, Shortcuts)
MMB (Middle Mouse Button) rotates the cube in 3D space. (or Alt/LMB)
G - Move (Object, Transform, Grab/Move)
R - Rotate - Y, X, Z (Object, Transform, Rotate on Axis)
RMB (Right Mouse Button) back to where you were?
S - Scale (Object, Transform, Scale)
RMB - Select
Blender Tutorial Lesson 2
From Object Mode to Edit Mode (Somehow I lost the ability to choose anything but Object Mode? Had to start over.)
Vertices outlined in Yellow now, not Pink
0 - Camera View (View, Camera) (That's zero on the number pad.)
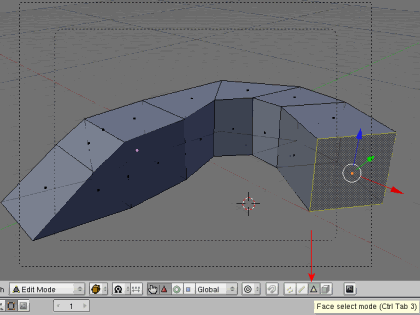
Triangle icon - the one that is outlined farthest to the bottom right, not the solid one - mouse hover says: "face select mode"
Right click on a side of the cube to select it.
E - Extrude
R - Rotate
Do that a few times.
File, New, Erase All to start over.
Add, Mesh, UV Sphere
Position Sphere on top of cube and save project.
Extrude and Rotate was fun to play with.
Sunday, March 01, 2009
A Version of the Truth - BOOK
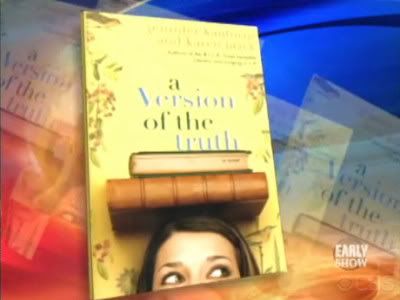
A Version of the Truth, by Jennifer Kaufman and Karen Mack.
I like this story and writing. The humor makes me laugh out loud.
I'm whipping thru it pretty fast. Almost done. I might reread this one. The use of the F word is pretty prominent, for those who don't like that kind of thing.
Setting: Topanga Canyon somewhere near Los Angeles, CA
Protagonist: "Cassie Shaw, a nature lover who's right at home with the call of birds and the sound of wind in the trees."
CBS Early Show Video
December 28, 2007 Friday
Transcript at book website
Ms. MACK: Well, sometimes the truth just isn't good enough. And then what do you do? I mean, we've all been in that situation. And you can take one road or the other, and that was sort of the dilemma.
Ms. KAUFMAN: Oh, we like writing about sort of quirky misfits.
"you're working on book number three already?"
"Another quirky misfit."
"This one disappears."
I'm definitely going to read their first book, Literacy and Longing in L.A.
"An unusual kind of love story about a woman named Dora (named after Eudora Welty) who goes overboard and uses books to escape all the challenges of her life."
Subscribe to:
Posts (Atom)