Sunday, February 06, 2011

Inkscape Hearts

I'm working in Inkscape 0.48 Windows 7.


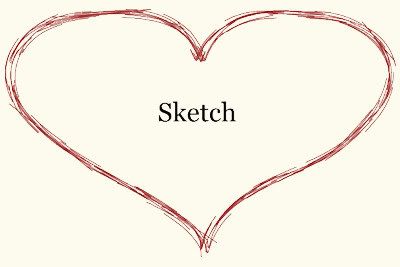
This tut on Sketch and Hatch does a pretty good job of illustrating these effects under Live Path Effect Editor.

My Notes:
Makes the right half of heart with Bezier Pen in Spiro Mode.
Selects the two end nodes, align selected nodes vertically
Select all nodes, Set to Auto Smooth (Node Tool Commands Bar)
Path, Object to Path
Duplicate, Flip Horizontal
Used align and distribute, but that didn't work for me, so I fiddled with it until I got it to line up.

Path, Combine
Tut says the path is still open.
How would you know that? Zoom in on top and bottom points where the two halves meet and you will see two nodes at top and two nodes at bottom. Select top two nodes, Join (Node Tool Commands Bar), do the same for the bottom two.
The heart should be one shape now.

After heart is combined/joined into one shape,
Simplify Path, Duplicate heart
Path, Path Effects Editor apply Hatches
With Node Tool, tweak nodes to get pattern the way you want it.
Shift/click to change stroke color.


Does Sketch next, same basic process, only select Sketch instead of Hatches.

More ideas:
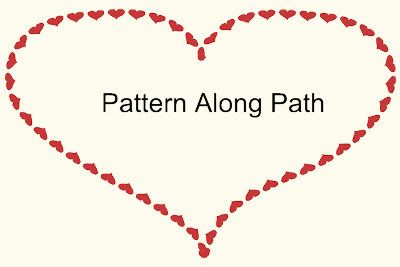
Could also duplicate heart, fill red, resize tiny, copy, then paste as pattern within the same Menu (Add Pattern Along Path, instead of Hatches or Sketch). Had to tweak the nodes a little bit.


Duplicate heart
Extensions, Modify Path, Add nodes and jitter, Fill with color


Is there an easier/better way to make a heart from scratch? Could you use a triangle? Convert to Path, add some nodes, tweak, etc.
Inkscape crashed when I tried to export as *.png. I did a Path, Combine and then tried export again and it worked. I don't know if that's always necessary.

Relevant Manual Links
Hatch/Sketch
Jitter

Inkscape Calligraphy

Inkscape 0.48 Windows 7


I just wore out my hand trying to create calligraphy with a mouse in Inkscape. Whew.
The above is a nice calligraphy font. ;)
Some day I'd like to buy a wacum tablet.

First of all, I wanted some kind of grid that would help me with proportion and angle.
There is free calligraphy guide paper that can be found on the Net when googled.
For example, here and here.

There is a grid in Inkscape (View, Grid).
Grid behavior is odd when zoomed.
The grid can be customized either globally (File, Inkscape Preferences, might require a restart) or locally (File, Document Properties, Grid Tab, New).
These settings will look like notebook paper:
Spacing X at 750, Spacing Y at 4 pixels (Grid units).

Inches Grid units as notebook paper would be: Spacing X at 8.5, Spacing Y at .3 (point 3).
(Regular notebook paper would have about 31-37 lines on a page if margin area were included.)
I then decreased Spacing X to add some vertical lines as well.

Inkscape Calligraphy Tut
(Online and also included with Inkscape download, see Help, Tutorials.)
Mentions slanted guides. Guides are created in Inkscape by dragging (horizontally, vertically, diagonally) off the rulers. Mouse hover over guide and read help text that pops up at bottom of screen for further instructions.

There is an Extension, Render, grid, which can be printed out.
Line Width at .1 (point 1), Horizontal at 750, Vertical at 20 looks like lined notebook paper.


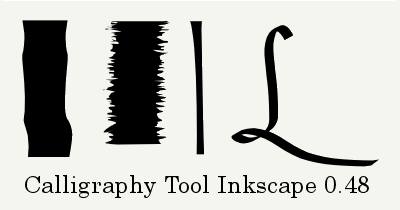
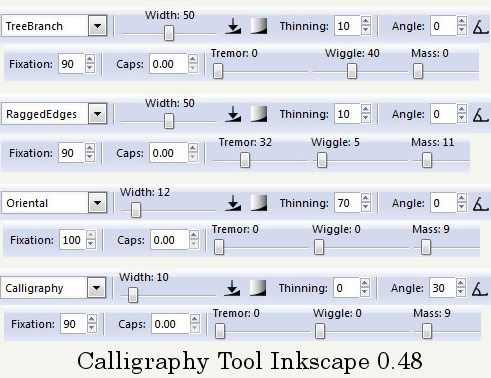
I created four calligraphy presets:
TreeBranch
RaggedEdges
Oriental
Calligraphy
Inkscape didn't retain the presets because when I loaded Inkscape later only one created preset was there. I did screenshots of my settings. Just a warning.


Release Notes that mention Calligraphy Tool:
040 (Thinning, Fixation)
045 (Caps, Wiggle)
046 (Line Engraving - has example image)
047 (Presets)
(Edit, Find "calligraphy" within Firefox.)


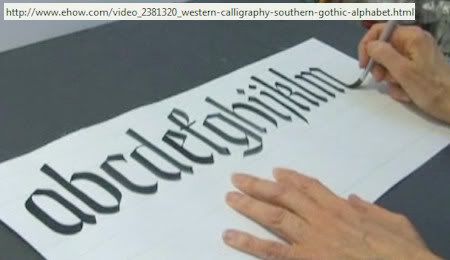
ehow
Handwritten calligraphy videos here.


Some Calligraphy lettering/fonts to google.
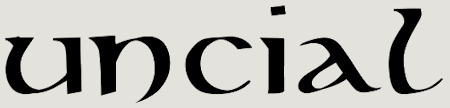
Uncial
Batarde
Carolingia(n)
Flourished Italian
Gothic

Inkscape Manual
0.47 Calligraphy Improvements
Another Manual

Inkscape And The Missing Triangle Mystery

I'm working in Inkscape 0.48 Windows 7.

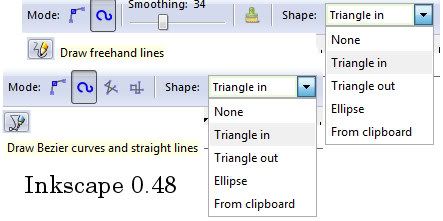
On the Tool Controls Bar of both Pencil and Bezier Pen tools there are Shapes to choose from.


These are like Pattern Along Path under the Extensions menu, which I've blogged about previously.

Manual
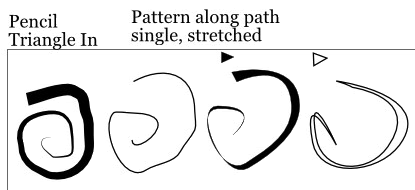
“Shape: Applies a shape to the path after it is drawn. This is equivalent to using the Pattern Along Path effect in Single, stretched mode.”

For example, if Triangle In is selected from the Pencil or Bezier Tool Controls Bar, that means the line created is stroked or filled with a pattern like a triangle.

So where's the triangle?

Watch this video and see if you can catch the missing triangle.

First, make sure Page Borders is turned on (File, Document Properties, Check the Show Page Border).
Then click on Pencil or Bezier Tools and choose Shape Triangle In from the Tool Controls Bar.
Draw a path or line near the top left page border.
Do not move it.
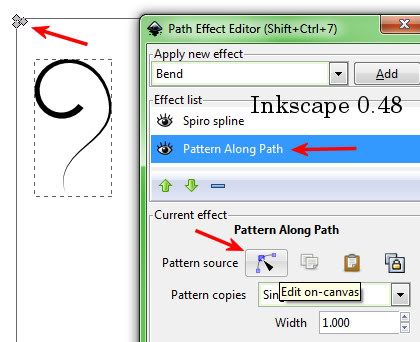
Go into the Editor (Path, Path Effects Editor, click on Pattern Along Path, click on Edit on Canvas Tool) and that little triangle (pattern) will show up at the top left hand corner of the Page Border. You can tweak that triangle (drag the nodes with the Nodes Tool and the path will also change.


The Path Effects are..."Live."

Manual Link

Ta da! The missing triangle mystery is solved.
Now how is a person supposed to know that?
You must become a member of the Secret Inkscape Society. After a rigorous initiation, you receive the special glasses. Only then will the hidden symbols in the Inkscape World be revealed. lol

The triangle should display when I create the path or have an option for turning display on/off.
And it should display near the path.
If I create a path or line at the bottom of the page border and MOVE it to the top, THEN go into the Editor, the triangle is not at the top left of page border; it's way up there on the screen. The triangle must initially get placed at top left of screen, but then if you move the line/path the triangle moves too.

Can I duplicate this effect by drawing a triangle, drawing a path, and using Extensions, Pattern along path.
Yup.


Ugly example, but does the job.
The trick is, to add a lot of nodes to the triangle, and make sure the triangle is the top most object.
Refer to my previous blog post for more details.

Thursday, February 03, 2011

Inkscape 3D Polyhedron

Inkscape 0.48 Windows 7.

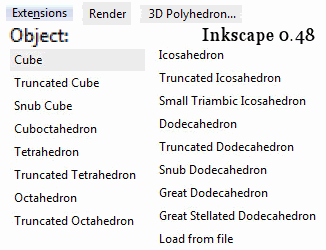
Extensions, Render, 3D Polyhedron
New in v0.47
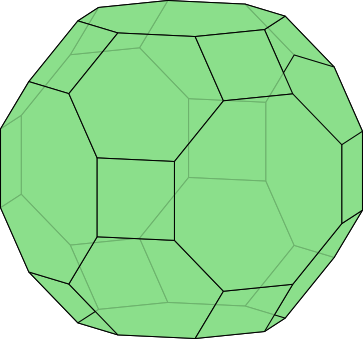
“The new Render > 3D Polyhedron extension draws 2D projections of 3D polyhedrons and other 3D shapes. You can choose one of a number of predefined shapes (cube, octahedron, truncated dodecahedron and others) or load a shape definition from an OBJ file. The shape can be rotated around any of the three axes by arbitrary amount; you can also define various style options such as color of the faces and stroke width, and enable shading with adjustable light source position.”

It's buggy and crashes if you fiddle with the settings a lot.
The settings get reset too, so it was hard to go back to where I was.
I did find out that Inkscape spit out backup svg's every time it crashed, thank you. ;)

There are 17 Objects you can render.


Each Object uses a "Filename" or *.obj file and there is an option to "load from file."
I can view an *.obj file in WordPad. Just a simple text file with parameters.
They are stored here:
Inkscape\share\extensions\Poly3DObjects\*.obj
AND there are extra objects in here. Copy and paste the filename in the Menu popup to render them.

Here's an extra:

great_rhombicuboct.obj


x 0, y 30, x 10
Shading off
Opacity 80%
Draw back sides
Stroke 1
RGB green - R 135, G 222, B 135

The next two were on the menu list.

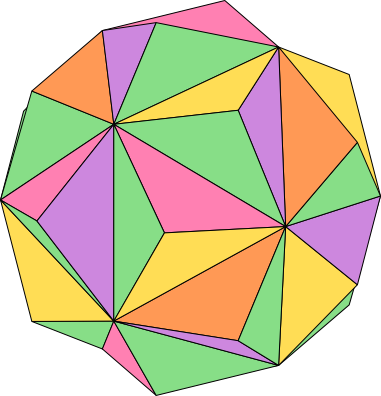
Small Triambic Icosahedron:


x 0, y 30, x 10
Shading off
Back sides off
Stroke wide 1
Scale 200
RGB green, R 135, G 222, B 135
I made colored rectangles for swatches.
Selected sides with Node Tool and colored with dropper.

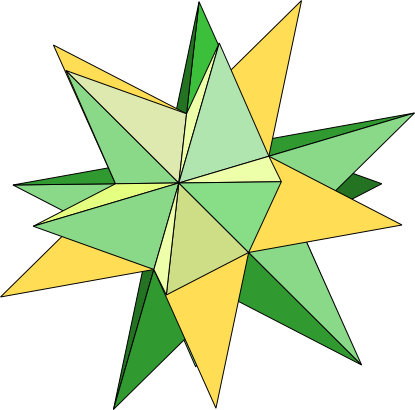
Great stellated dodecahedron:


x 30, y 30
Shading off
Back sides off
Stroke wide 1
Scale 100
Select sides with Node Tool and color.

I didn't like the Shading. The colors were way off and way too dark.
Manual

Inkscape Soft Puffy Clouds

I'm using Inkscape v0.48 in Windows 7.

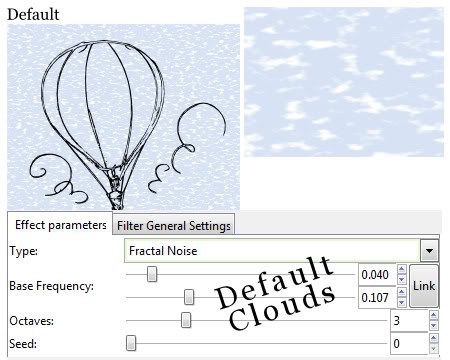
I don't like the default clouds.
Filters, Overlays, Clouds


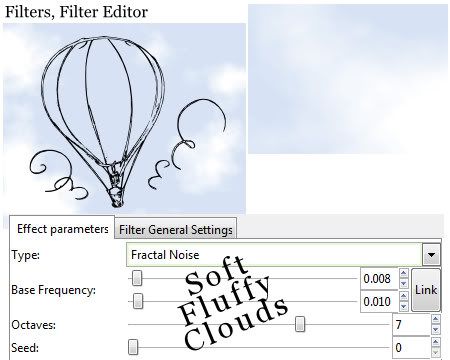
This is where the Filters, Filter Editor comes in.

I made some soft puffy clouds back in version 0.46 when the filters first came out and the info still applies.
Previous Post


More soft puffy stuff:

Inkscape Perspective

I'm using Inkscape 0.48 in Windows 7.


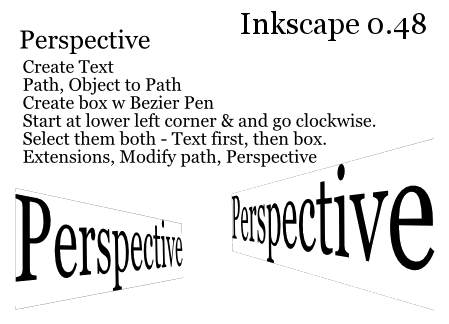
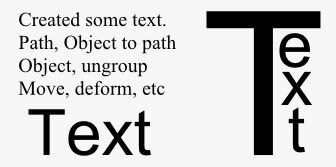
Text:
Create Text
Path, Object to Path
Create box border w Bezier Pen
Start at lower left corner & and go clockwise (4 nodes).
Select both, text first then border.
Extensions, Modify path, Perspective

Manual
Discusses how to tell what first node is and how to change that and the direction. I could not get that to work.

YouTube
An older version Inkscape, but still useful for Perspective. The tut starts about 1:42 into the video.

I tried making perspective text on a 3D box also.
Of course the node start and direction is not correct and I couldn't figure out how to change that.
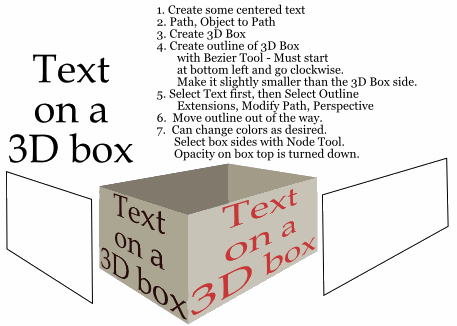
So, what I did was to just make a box border with bezier pen tool again and go around the side of the 3d box that I wanted the text to go on. The process is the same as above.


Text:
1. Create some centered text
2. Path, Object to Path
3. Create 3D Box
4. Create outline of 3D Box with Bezier Tool. Must start at bottom left and go clockwise (4 nodes). Make it slightly smaller than the 3D Box side.
5. Select Text first, then Select Outline, Extensions, Modify Path, Perspective
6. Move outline out of the way.
7. Can change colors as desired. Select box sides with Node Tool. Opacity on box top is turned down.

NOTE: I think Extensions/Modify Path/Envelop is supposed to do something similar to Perspective only it will warp an object to shape. Something to check out. I couldn't get it to work the way I wanted it to. Maybe it's the node start and direction issue again.
This video uses Bezier Envelope. Similar? (Extension for Inkscape version 0.48 at Flickr.) Mentions Envelope Deformation, which can be found under Path/Path Effect Editor. Manual Ref

Tuesday, February 01, 2011

Inkscape JessyInk


JessyInk is basically PowerPoint for Inkscape and Browser. It doesn't work in Internet Explorer, however. When I open an *.svg in IE, it displays the code, not the slides.

I watched a nice video demonstrating what JessyInk is and how to set it up in Inkscape.

Animated Presentations with JessyInk
Inkscape 0.46

The first 3 minutes of the video takes you thru the steps to download, which you don't have to do with Inkscape 0.48 because it's already included in that version under the Extensions Menu.

JessyInk adds a Java Script to your svg file.

I watched how to set up slides for Browser viewing (File, Document Properties). Each layer in Inkscape is a slide. This is similar to setting up animation in Paint Shop Pro so the concept is familiar to me. You can designate a Master Slide that will display on every slide or layer which saves some creation time. I learned how to view the xml code in Inkscape, which is what an *.svg file is. I didn't see the Java code talked about in the video when I opened the *.svg in WordPad.

I couldn't advance an *.svg slide in Firefox until I noticed NoScript was blocking it. Duh. Slides advance with Arrow keys, Pgdn/Pgup, Mouse Scroll or Click, Space Bar.

On the video he clicks an icon on the Commands Bar to view the xml code.
Via Menu system that's: Edit, XML Editor.
I like using Menus when learning. Shortcuts come later.

To Display the Layers Window in Inkscape, go to Layers Menu, Layers.
I like my windows Floating rather than Dockable (default) which is set under File Menu, Inkscape Preferences, Windows and requires a restart. Floating windows is handled much better in Inkscape than it used to be, so that's an improvement. The windows used to just disappear, but now they fade transparent so they are out of the way but you can still see them. Works for me.

I didn't spend much time on this, creating a bunch of slides, etc. because I don't have a use for the feature right now, but I did want to get a general overview of it.

Demos/Links

From above video link:
JessyInk.svg
Navigation on this one is different. Not sure why. Left Mouse click, and Arrow Over keys.

From
timteatro
JessyInk_Tutorial.svg
864×486 size slides, 16:9 ratio.
Advantage: Vectors scale, Rasters don't.
Extensions, JessyInk, Master Slide - enter Layer Name that you want as Master Slide.
Title on each slide: Type "Slide Title" on Master slide, then Extensions, JessyInk, auto-text - enter text you want to display.
Bullets, Slide Transitions.

From
Google
JessyInk_1_5_2_showcase.svg

Other Links:
Discussion

Monday, January 31, 2011

Inkscape Interpolate vs Extrude vs Motion

I'm using Windows 7 Inkscape v0.48.
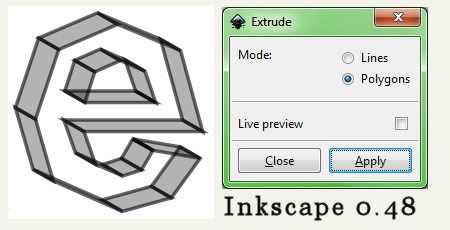
I discovered that Extrude is totally different than it used to be.
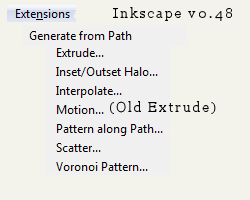
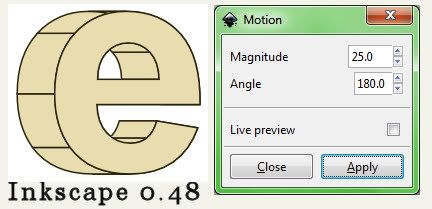
The old Extrude effect has been renamed Motion (Release 0.47).

Extensions Menu:

Extrude:

Motion:

Interpolate:
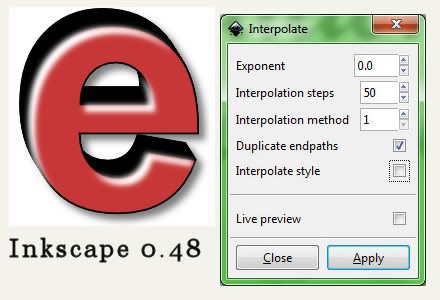

The video I worked thru was for Inkscape v 0.45.
3D Text Using Interpolation
Relevant Manual Link for v0.48.

My Notes on what worked in v0.48:

Make some text with the Text Tool.
Switch to Selector Tool first, if you want to change colors (see note below).
Path/Object to Path, Object/Ungroup, Path/Combine,
Edit/Duplicate, Shift top layer slightly with Selector Tool,
Extensions/Generate From Pattern/Interpolate
OR
Extrude
OR
Motion (Can skip Combine & Duplicate.)
Same process.

It should look like some 3D text at this point.
(I think Union also worked instead of Combine.)
It didn't make any sense to me to ungroup and then combine, but the effect will not work without it. The combo makes one complete path, whatever that means.
Use Edit/Undo History to see if each step is executed.
For example, the Video used Break Apart instead of Ungroup, but Undo History showed the command was NOT executed.
I sure wish Inkscape would give a helpful prompt when it cannot execute a command.

Interpolate made my NEW laptop sluggish just doing a little text. I hate to see what it would be like if I was working on a bigger project. Would have to simplify/combine the interpolation result somehow, I suppose. Inkscape gets sluggish when using Filters also.

Tried Path, Path Editor Effects, Interpolate Sub-paths. It worked, but I got a really weird looking stacked letter "e" when applied on "interpolate" text.

A glitch on Object to Path step:
Color text in Selector Tool mode NOT Text Tool mode.
In other words:
With Text Tool create text, switch to Select Tool, THEN change text color, Object to Path, OKAY.
With Text Tool create text and change color first and then switch to Select Tool, Object to Path, text turns black.

Next on the video is add a white highlight to the interpolated text.
Go back to the text used to interpolate.
It should be black fill color with no stroke color.
Duplicate twice.
Color one white color.
Shift over, down slightly.
Select both.
Path, Difference.
Color white again.
Move on top of Interpolated text.
NOTE: I moved it THEN colored it white. Easier to see.
Object, Fill and Stroke, Blur 2 and Opacity 75 on the white highlight.
Mine was Blur .5, Opacity 100.

There might be a Filter that does something similar to a highlight, I didn't look. There are tons of Filters.

Next, add a Drop shadow.
I used Filters, Shadows and Glows, Drop Shadow, default settings.

Just playing some more with Motion:


UPDATE:

The Interpolate Tutorial (Help, Tutorials, Inkscape: Interpolate) mentions none of these extra steps (Ungroup, Combine). And perhaps they are not necessary for the specific application(s) used in the tutorial.

The tutorial talks about the first node being important and also the order that you select the objects (exponent parameter).

I find that sometimes rotating the Object so first node is in a different position will make Interpolate work.
Another time, Object, Move To Top worked.

Tut says:
“To find the starting node of a path, select the path, then choose the Node Tool so that the nodes appear and press TAB. The first node that is selected is the starting node of that path.”

My observations tells me one difference in the method parameter is *sometimes* the direction of the interpolation. (Make the objects different colors.)

The tutorial also demonstrates the Style parameter, which I did not talk about here and shows how that can be used to create interesting gradient effects.
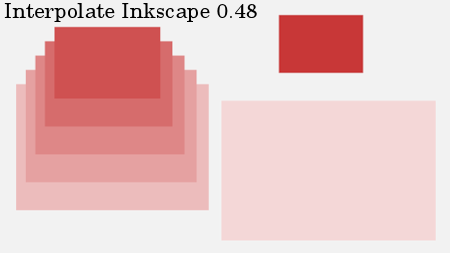


Reminds me of the Feedback Effect in Paint Shop Pro.

Inkscape Spheres

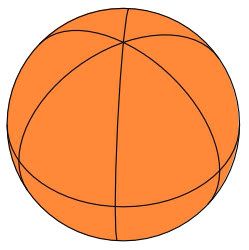
Besides 3D Boxes, there's also a Sphere to play with.
New in Inkscape 0.48.


Extensions, Render, Wireframe Sphere
Tutorial
via heathenx

Friday, January 28, 2011

Inkscape 3D Boxes

3D Boxes in Windows 7 Inkscape 0.48.

3D Boxes Tool has been in Inkscape since version 0.46, but I've never blogged about it.
I like to document things I learn for later reference.


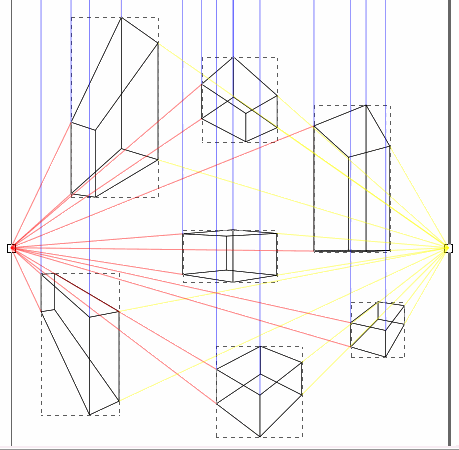
Screenshot Image: All boxes selected, Outline View, Page Border On, All boxes have the same Vanishing Points (VPs), Y VP is infinite (blue lines), X and Z VPs are finite. That's 2 point perspective.

All 3D boxes created on screen have the same Vanishing Points (VPs) by default.
It's as if you are creating one "scene" or structure from the same perspective.
If a box is moved with the 3D Tool, the VPs stay the same.
That means the box changes shape and size as you move it around on the screen.
Holding the Shift key down while moving a Vanishing Point will effect just the selected box or boxes.

If a box is moved with the Tool Pointer, the box gets independent Vanishing Points.

I always forget to read the context sensitive help text that pops up at the bottom of the screen on the Status Bar.
Move mouse cursor over the various points on the box and read the help text.

If you just happen to draw that first box *anywhere* on the screen, the box can act and look really strange. "Normal" perspective must be within the Page Border boundaries. (View, Document Properties, Show Page Border - On by default.) I usually have Page Borders shut off. Try creating a box with part of it outside and part of it inside the Page Border. lol

Try making several 3D boxes at different areas on the screen which will all have the same VPs by default. The further away you get from "normal" box, the more distorted the boxes get. Then drag a Vanishing Point (with 3D Tool). Whoa. Vertigo. lol All the boxes change. That's kinda fun. A good way to learn about perspective.

I found 3D boxes difficult to work with on a small screen. Vanishing Point ends are far away from the box, which makes sense, but makes it difficult to edit. Have to zoom in and out a lot.

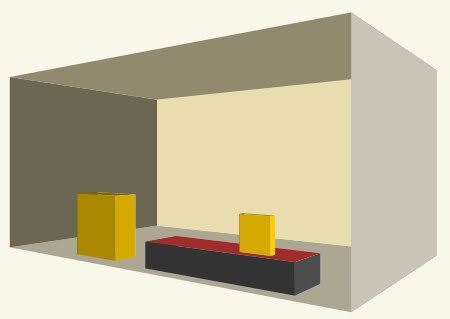
Some sample boxes I made:


LINKS:

Here's basic info tut.
Official Manual on 3D Boxes.
NOTE: Fill/Stroke color is shown on Tools Control Toolbar. Mine says "None" for both Fill and Stroke. Have to use the Node Tool for coloring in my Windows 7 version (mentioned below). (Ctrl/Click with the Pointer Tool also works.)

I tried walking thru this
3D first-aid kit tutorial (Apr 2010).

I got stuck at step 2. Not for newbies.
Step 2:
"disable parallelism of edges, position the object the way we need it, define final size and change colors."
Okie dokie...Five hours later...lol...

My NOTES:
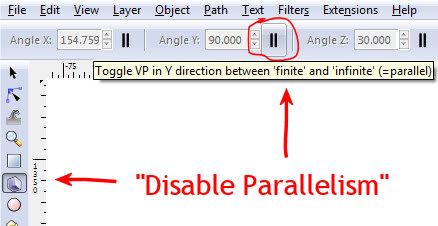
That little icon button on right side of Angle Y on the Tools Control Toolbar "disables parallelism" or sets Vanishing Point (VP) to finite. (Angle Y is set to infinite VP by default. Toggle On/Off with that little icon button.)


Pull Angle Y down toward bottom of box.
The other two vanishing points got flipped? (Angle X and Z)
Object, Flip Horizontal?
Select a side to color with the Node Tool. (Or Pointer Tool Ctrl/Click.) That's also how to make a side transparent (no color).

Step 3:
Objects, Ungroup
View, Display mode, Outline
Alt/Click to select and delete sides you don't "see."
Good luck with that.
But hey, Ungroup is how to take the lid off the box or remove the wall from the room, etc. (Could also set to no color.)
I didn't know about the Outline View. That's how it would look if you were drawing it out on paper with pencil and ruler by perspective.

It all went downhill from there and I quit.
I didn't understand what duplicating the box was supposed to do.
Union made the box turn dark blue.
My Guides were way more complicated than what the tut showed.
I didn't want to fiddle with rounding and gradients and finishing.

Monday, January 24, 2011

Inkscape Spiral

I just spent hours trying to figure out how I made that orange spiral in Inkscape way back in 2007.
Blogged previously
See also
Paint Brush


Here are the spiral instructions for Inkscape 0.48 in Windows 7.

How to:
1. Make a spiral (spiral tool)
2. Make a tiny circle/ellipse (circle tool) and keep it selected
3. Path, Object to Path
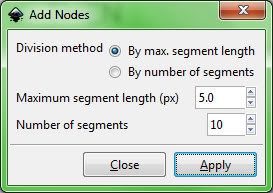
4. Extensions, Modify Path, Add Nodes
This popup menu must have changed? It took me a while to figure out the settings.
Was under Effects Menu, now under Extensions Menu.
Division method: By max. segment length
Maximum segment length (px) 5.0
Number of segments 10.


5. Note the Circle (fill pattern) must be the top most object.
If the spiral is made first, I think the circle will automatically be the top object.
Otherwise select the circle/pattern and:
Objects, Raise to the Top

6. Select both objects (circle and spiral)
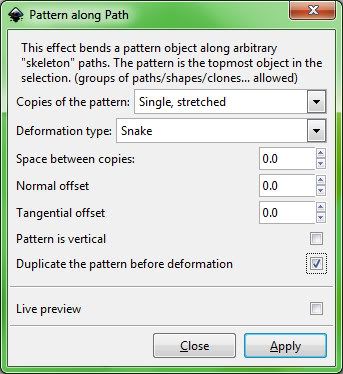
7. Extensions, Generate from Path, Pattern along Path
(Was under Effects Menu, now under Extensions Menu.)

Copies of the pattern: Single, stretched
Deformation type: Snake
Space between copies 0
Normal offset 0
Tangential offset 0
Pattern is vertical unchecked
Duplicate the pattern before deformation checked


Additional Notes:
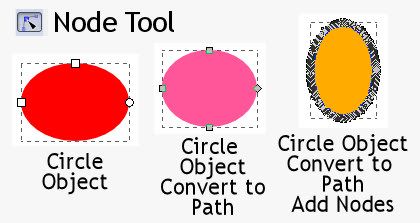
It took me the longest time to figure out it was the circle that I had incorrect and so pattern on path would not work the way I wanted it to. Try pattern on path with just a plain circle and see what happens.

The different types of circles can be identified by clicking on them with the Node Tool.


Another thing that is helpful when working in Inkscape is Edit, UnDo history displayed. That will indicate whether or not Inkscape could execute the command on the object as it is.

UPDATE:
I'm working thru some Inkscape video tuts and this one applies to Pattern Along Path.
Episode 066 – Intro to Live Path Effects (LPE)
Inkscape v0.46
Video demonstrates some of the items under Path, Path Effects Editor.
First up is Bend effect, which I didn't know about.
Then Pattern Along Path.
Not sure what all is different from the Pattern Along Path under the Extensions Menu.
"Live" maybe?
The way the effect was applied is definitely *different*.
On the video he copied the pattern to clipboard, then selected path and went into Path Effects Editor, applied (Add) Pattern Along Path, and then clicked on the icon for *Paste Path*.
It did not require that both items be selected and the pattern be top most object as is required under the Extensions Menu.
No fill color on result, but can add any fill color you want.
I used Pencil in Spiro Path Mode for my path, which wasn't available when the video was made. It makes a nice smooth curvy line, no need to smooth with Ctrl/L (Simplify).
The video is a good visual aid to learning this technique, plus it can be downloaded and played in VLC.
I like watching people work in Inkscape. He does selection zooms with the Zoom Tool, which I forget to use.
Also Inkscape 0.48 has a lot more effects under the Path Effects Editor.

Manual link for Inkscape v0.48 on
Path Effects Editor
“...it is planned to migrate most of the path effects found under the Extensions menu to LPEs. This has two advantages: The effects will be faster to render and the original path is stored for future editing.”

Inkscape 0.48

I was checking out what's new with Inkscape (0.47, 0.48) since the last time I blogged about it.
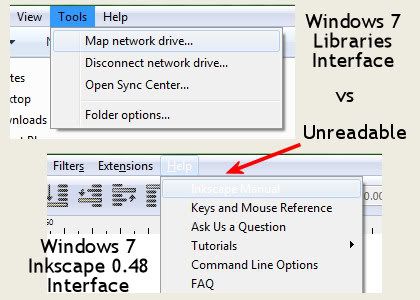
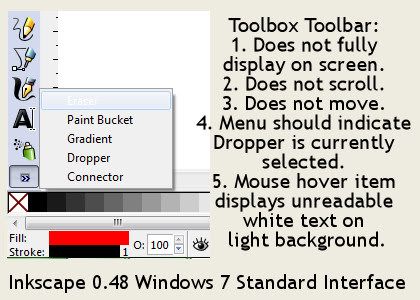
Some notes follow, but first, the following interface problems bother me a lot.
(Inkscape 0.48, Windows 7, 14" wide screen laptop.)


I would think that the white text on light background is easy enough to fix, but I couldn't find a way to fix it myself.
Instructions to change Theme didn't work, although I did get some kind of old style default theme, which was ugly but more readable.

The toolbars need a lot of work.
Toolbars need: customize, scroll, move


As far as I could find, the only change I can make to the Toolbox is icon size.
Files Menu, Inkscape Preferences, Interface, Toolbox Icon size.

The other toolbars reposition with View Menu, Default/Custom/Wide.
Custom will put all toolbars (except Toolbox) horizontally across the top of the screen, so at least I can use them.
Vertically they are unusable because they don't scroll and I can't see what is selected.

The Tools Control needs a tighter design so it doesn't hog so much screen real estate.
If I could customize the Toolbars, I could probably eliminate at least one of them.

I hid the Commands Bar and the Snap Controls Bar:
View Menu, Show/Hide

I had to dig up how to change the default template again.
Inkscape/Share/Templates/Default.svg
Open, edit, save this file to get Inkscape to automatically open at 100% zoom without page borders.
blogged previously

Links/What's New Notes:

Manual
Anatomy of Inkscape Window

New in 0.46 since I posted the version 0.45 Toolbox icons:
Bucket
Tweak
3D Boxes
Release Notes 0.46

New in 0.47:
Eraser
Release Notes 0.47
Spiro Mode on Pencil (below) and Pen was new in version 0.47.
(Manual says "not very useful"?)

Filter Effects were reworked a lot.
Added tons of preset filters.
The Filter editor is still there, so can tweak applied preset filters and make other custom filters.

Lots of changes to Extensions Menu (formerly Whiteboard).

New in 0.48:
Spray
(I thought airbrush, but it's more like a brush clone.)

Release Notes 0.48
Text was reworked a lot and feels more fun to use.


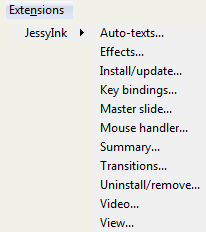
New items on the Extensions Menu:
Jessy Ink is new
Modify Path, Pixel Snap
Color, Black and White
Generate from Path, Voronoi Pattern
Web, Slicer

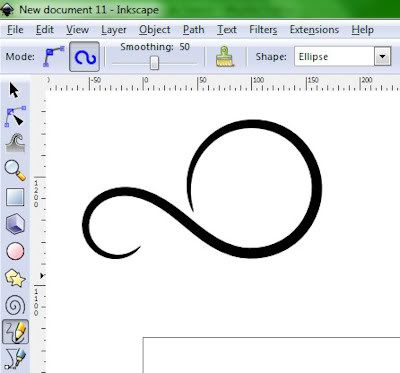
Pencil and Pen seem more fun to use too. I'm not sure what all was changed on those.


Here's a brief YouTube tut for swirlies:
Inkscape Tutorial - Swirls and Flourishes

My notes as I watched the video:

1. Draw Freehand Lines Tool (Pencil), Create Regular Bezier Path, Smoothing 50, Shape: Triangle in
Draws with that.
2. Draw Bezier Curves and Straight Lines Tool (Pen)
Draws a shape.
Select and Transform Objects Tool, Right click, Copy to clipboard

3.Back to Draw Freehand Lines Tool, Shape: from clipboard (instead of Triangle in)
Draw a shape.
Copies them.
Resize and keep proportion need to: Path, Objects to path
Moves them around, rotates, etc.
Select all, colors, left click fill color, shift/click stroke color
Path, Object to Path
Path, Union

Draw rectangle, send it to bottom
Select stroke and fill colors
Create gradient
Copy union shape, Flip Selected Objects Horizontally to mirror
Object, Group, Gradient
Copies the grouped shape again, move to back and blurs it
via the Fill/Stroke Menu so it looks like a glow.

Sunday, January 16, 2011

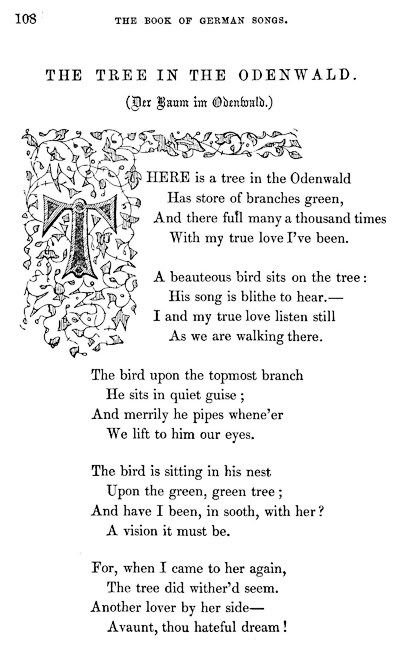
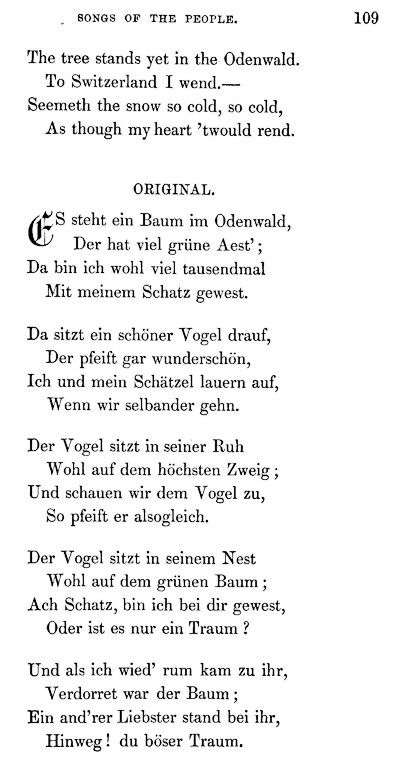
German Songs 16-17th Century

Found this little gem in the archives.
The book of German songs : from the sixteenth to the nineteenth century (1856)
Author: Dulcken, H. W. (Henry William), 1832-1894
Subject: Ballads, German; Ballads, German; Folk songs, German; Folk songs, German; German poetry; German poetry
Samples:


Norwegians in North Dakota

This is the third and last post in "The Way It Was" series.
Previously:
1. Native Americans
2. German from Russia
Next is Norwegians.

Notes from:
The Way It Was
The North Dakota Frontier Experience
Book Two: Norwegian Homesteaders
c. 1998
By Everett C. Albers and D. Jerome Tweton, Editors

Introductory Section:
The Norwegians in North Dakota History
D. Jerome Tweton

Why North Dakota?
The good farmland in other areas of America had been taken. North Dakota area had a reputation as fertile region for farming.

Very few Norwegians went directly to North Dakota upon arrival in the United States. Some had been successfully farming elsewhere and reinvested where the land was free. Others saved up enough money to start a farming operation and then moved to North Dakota.

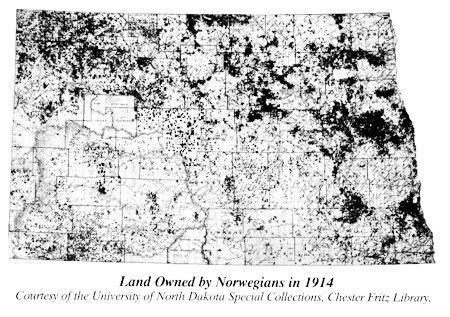
Like other immigrant groups, they tended to cluster together.


They preferred the river valley areas of the state.

Like the Germans from Russia, they also combined the various land laws to acquire large chunks of land.

That's about it for the introductory section on Norwegians. I was hoping to find more information on their story before they came to the United States.

The book continues with the individual settler stories recorded in the 1930s and on record in the state.

That's all I have of this series.
I blogged three: Norwegians, Native People, Germans from Russia
And briefly mentioned Book One on Sod-busters. There wasn't much of an introductory text in that one. It did give more details on collecting the stories.

Other books in the series:
1. The Cowboys & Ranchers (Book 3)
2. The Townspeople
3. The Horse and Buggy Doctors
4. The Teachers

I liked how these books were done. They don't give you a big heavy data dump. Just a nice brief clear introductory summary and then on to the personal stories and experiences.

Germans From Russian in North Dakota

I've been digging around in North Dakota history, focusing on how it all began, and where the people came from.
Previously: Native Americans

Notes from:
The Way It Was
The North Dakota Frontier Experience
Book Four: Germans from Russia Settlers c. 1999
By Everett C. Albers and D. Jerome Tweton, Editors

Introductory Section:
In Search of a Better Life: The Germans From Russia, by D. Jerome Tweton

“Der Erste hat den Tod,
Der Zweite hat die Not,
Der Dritte erst hat Brot.”

“For the first generation, there is death.
For the second, there is want.
Only for the third is there bread.”
—Black Sea German proverb

Why were there Germans in Russia?
Because Catherine The Great (German royal ancestry) Russian Ruler 1762-1796 offered them:
a. free land
b. exemption from service in the Russian army
c. religious freedom
d. local self-government
e. and tax exemption
to come on over to southern Russia and develop the lower Volga River and Black Sea regions.


Black Sea area is now southern Ukraine. Muldova borders Ukraine.
Bessarabia Map
Europe

Why did they leave Russia?
Well, everything went fairly well until Tsar Alexander II (1855-1881) came along and started taking away what Catherine The Great had offered. Then Tsar Alexander III (1881-1894) was even worse. He decided the Germans from Russia must be "Russianized" or assimilated into mainstream society.

Assimilate!

Besides the political situation, there was also land shortage and economic distress.

Why North Dakota?
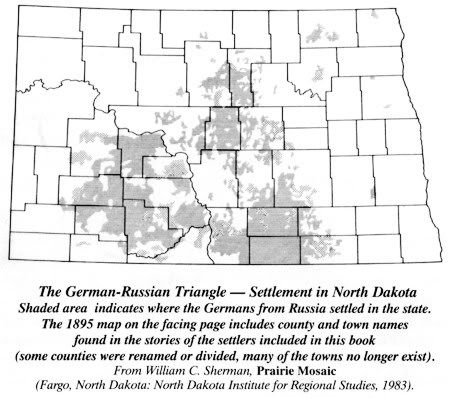
They came to the US to farm and land scouts determined the best unclaimed land was in the Dakota Territory. They started in what is now called South Dakota and by 1884 had pushed up into North Dakota area.


How much land are we talking about?
I hadn't realized these were large chunks of land.
In Book One of the series, Sod-Busters, it says:
People learned how to use the land laws to their advantage. One could parlay the Preemption Act, the Homestead Act, and the Timber Culture Act (plant those trees!) into 480 acres (160x3=480).
160-acre preemption cost $1.25 an acre.
The most common combination was a homestead and tree claim for a total of 320 acres.
Sometimes unmarried couples would file on adjoining quarters of land and then marry afterward, giving them a 320-acre farm.
A father and four sons of legal age could homestead adjoining quarters forming an 800-acre farm (5x160=800).

Back to Book Four.
Now the part that got a little confusing to me was differentiating among various groups of Germans from Russia.
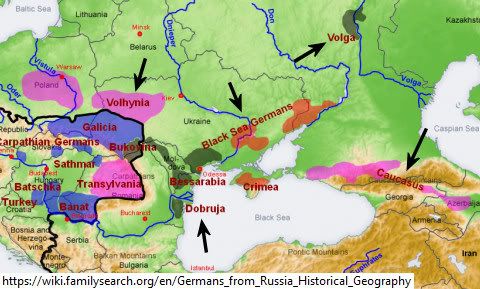
The above group as a whole is referred to as Black Sea Germans.
The Volga Germans were the first immigrants to leave Germany for Russia in the 1760s.
(immigrants - to vs emigrants - from)

Tweton further divides with:
Germans from the Caucasus region
Dobrudja Black Sea Germans (to ND via Canada)
German-Russian Mennonites
Volhynian Germans

Tweton says the Volga, Caucasus and Volhynian Germans never came in great numbers to North Dakota.

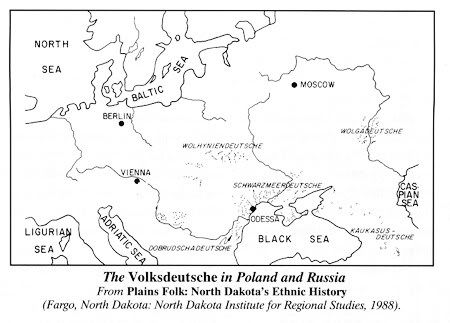
The point being that this was a diverse group. They came from different parts of the Russian Empire, spoke different German dialects, and had different religious backgrounds as well. They had a strong loyalty to their particular village/region.

This visual helped:

I added the arrows and cropped to fit my blog.

The time frame wasn't readily apparent to me at first either. I wasn't aware that Germans were moving to Russia over a long period of time, from the 1760s til 1850s? I'm still not sure how that all happened. Also, I think the Germans sometimes didn't come directly from Germany to Russia. Didn't some migrate after the Napoleonic wars to other areas like Poland? I'm not sure of the geography back then.

So are the different German dialects a lot different from each other? I don't know.
The only thing I know in German are swear words.
Donnerwetter noch einmal!
lol

I think the usual route to America was to take a train to Germany, probably a seaport like Hamburg, and then take a ship to New York. After that they took a train again, I think. Sometimes part of the journey within the US was by covered wagon.

Travel Routes for Germans leaving Russia to North America.

A Brief History of the Germans from Russia
says
First the colonists settled along the Volga River from 1764 to 1767.
Then later as Russia acquired Ukrainian lands north of the Black Sea and the Crimean Peninsula and Bessarabia, the colonists also settled in these areas as well.
[Article note: Bette's first name is Johann; his middle name is Ludvig.]