
Blogged previously
See also
Paint Brush

Here are the spiral instructions for Inkscape 0.48 in Windows 7.
How to:
1. Make a spiral (spiral tool)
2. Make a tiny circle/ellipse (circle tool) and keep it selected
3. Path, Object to Path
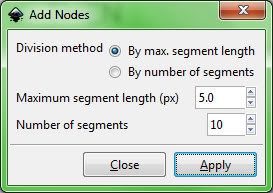
4. Extensions, Modify Path, Add Nodes
This popup menu must have changed? It took me a while to figure out the settings.
Was under Effects Menu, now under Extensions Menu.
Division method: By max. segment length
Maximum segment length (px) 5.0
Number of segments 10.
5. Note the Circle (fill pattern) must be the top most object.
If the spiral is made first, I think the circle will automatically be the top object.
Otherwise select the circle/pattern and:
Objects, Raise to the Top
6. Select both objects (circle and spiral)
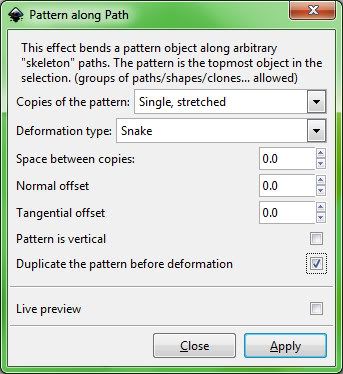
7. Extensions, Generate from Path, Pattern along Path
(Was under Effects Menu, now under Extensions Menu.)
Copies of the pattern: Single, stretched
Deformation type: Snake
Space between copies 0
Normal offset 0
Tangential offset 0
Pattern is vertical unchecked
Duplicate the pattern before deformation checked
Additional Notes:
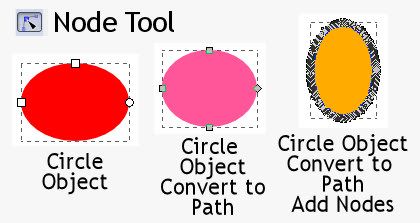
It took me the longest time to figure out it was the circle that I had incorrect and so pattern on path would not work the way I wanted it to. Try pattern on path with just a plain circle and see what happens.
The different types of circles can be identified by clicking on them with the Node Tool.
Another thing that is helpful when working in Inkscape is Edit, UnDo history displayed. That will indicate whether or not Inkscape could execute the command on the object as it is.
UPDATE:
I'm working thru some Inkscape video tuts and this one applies to Pattern Along Path.
Episode 066 – Intro to Live Path Effects (LPE)
Inkscape v0.46
Video demonstrates some of the items under Path, Path Effects Editor.
First up is Bend effect, which I didn't know about.
Then Pattern Along Path.
Not sure what all is different from the Pattern Along Path under the Extensions Menu.
"Live" maybe?
The way the effect was applied is definitely *different*.
On the video he copied the pattern to clipboard, then selected path and went into Path Effects Editor, applied (Add) Pattern Along Path, and then clicked on the icon for *Paste Path*.
It did not require that both items be selected and the pattern be top most object as is required under the Extensions Menu.
No fill color on result, but can add any fill color you want.
I used Pencil in Spiro Path Mode for my path, which wasn't available when the video was made. It makes a nice smooth curvy line, no need to smooth with Ctrl/L (Simplify).
The video is a good visual aid to learning this technique, plus it can be downloaded and played in VLC.
I like watching people work in Inkscape. He does selection zooms with the Zoom Tool, which I forget to use.
Also Inkscape 0.48 has a lot more effects under the Path Effects Editor.
Manual link for Inkscape v0.48 on
Path Effects Editor
“...it is planned to migrate most of the path effects found under the Extensions menu to LPEs. This has two advantages: The effects will be faster to render and the original path is stored for future editing.”
No comments:
Post a Comment